SPICED SWEET POTATO + LENTIL SOUP

Indulge in the comforting flavors of autumn with our hearty Spiced Sweet Potato & Lentil Soup. This creamy and satisfying dish is packed with nutrients and perfect for a cozy night in. The sweet potatoes add a touch of sweetness, while the lentils provide a hearty protein boost. The blend of warming spices like cumin, coriander, and turmeric will leave your taste buds dancing. It's a perfect balance of flavor and nutrition that will keep you coming back for more!

Yields: 4 servings Prep time: 20 minutes Cook time: 30 minutes

Ingredients:

  • 1 tablespoon olive oil

  • 1 onion, chopped

  • 2 carrots, chopped

  • 2 celery stalks, chopped

  • 2 cloves garlic, minced

  • 1 teaspoon ground cumin

  • 1 teaspoon ground coriander

  • 1/2 teaspoon ground turmeric

  • 1/4 teaspoon red pepper flakes (adjust to taste)  

  • 1 (15-ounce) can lentil soup

  • 1 (15-ounce) can diced tomatoes, undrained

  • 2 sweet potatoes, peeled and cubed

  • 4 cups vegetable broth

  • Salt and pepper to taste

  • Fresh cilantro for garnish

Instructions:

  1. Heat olive oil in a large pot over medium heat. Add onion, carrots, and celery and cook until softened, about 5 minutes.  

  2. Stir in garlic, cumin, coriander, turmeric, and red pepper flakes. Cook for 1 minute more.

  3. Add lentil soup, diced tomatoes, sweet potatoes, and vegetable broth. Bring to a boil, then reduce heat and simmer until sweet potatoes are tender, about 20 minutes.  

  4. Use an immersion blender or transfer the soup to a blender and puree until smooth.

  5. Season with salt and pepper to taste.  

  6. Garnish with fresh cilantro and serve hot.

Enjoy this hearty and flavorful soup!

HEALTHY + DECADENT CHOCOLATE COVERED TRUFFLES (V, GF)

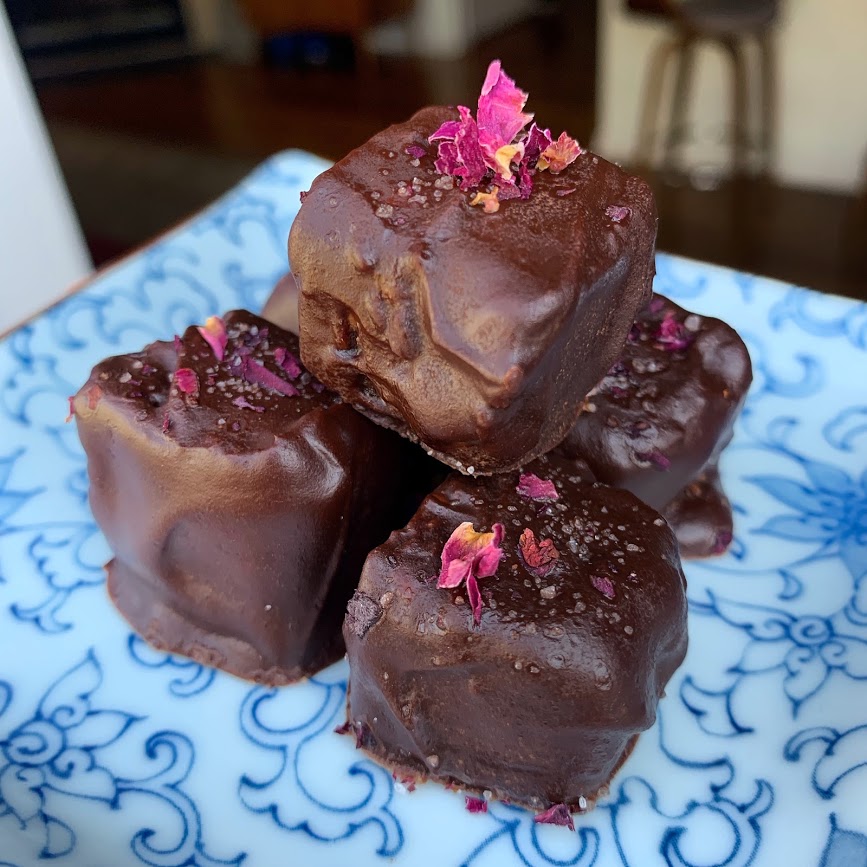
healthy chocolate cover date and nut truffles gluten free vegan dessert

It’s been far too long since I’ve posted a fresh new recipe for you guys! Ever since I started making desserts for my client who is staving off sugar I’ve had a blast coming up with healthier versions of my favorite desserts. These truffles are refined sugar-free, gluten-free and vegan. They are healthy enough for breakfast and decadent enough for dessert because they’re really just glorified date and nut bites. You won’t be able to eat just one - they are so addicting! I like eating them straight outta the freezer one luxurious bite at a time. Or you can go for it like my client and throw a whole truffle in your mouth! Go ahead. I won’t be offended. ;)

Whoa baby look at that golden glow. Feel free to cover in edible gold if you happen to have that laying around!

Whoa baby look at that golden glow. Feel free to cover in edible gold if you happen to have that laying around!

HEALTHY + DECADENT CHOCOLATE COVERED TRUFFLES (V, GF)

INGREDIENTS
2 c pitted dates
2 c nuts and/or seeds of choice (I used whole flax, raw almond, and raw cashew)
1 c shredded unsweetened coconut (if you don’t want to use coconut, add in an extra 1/2 of nuts or seeds)
1/2 t himalayan pink salt
2 T raw cacao powder + 4 T more
4 T coconut oil (i like the kind that comes in a glass container)
1-2 T maple syrup or monkfruit sweetener
Splash of vanilla extract
Optional topping: pink salt + edible rose petals

TRUFFLE DOUGH DIRECTIONS
1. Soak 2 cups dates in hot water until soft.
2. Pulse together 2 cups of your favorite nuts and seeds
3. Add pitted soaked dates, 2 T cacao, splash of vanilla extract and 1/2 t himalayan pink salt and blend until a dry dough forms.
4. Dump mixture onto a large sheet of parchment paper and ya the paper to form the dough into a large flat brick about 1/2”-1” thick. You can also roll them into balls but this is such a time saver and makes cute cubes!
5. Slide onto a plate and stick it in the fridge or freezer (wherever you have space) for ~10+ minutes.
6. Once hardened cut into cubes and set aside.

CHOCOLATE SHELL DIRECTIONS
1. Over a double boiler, melt 4 T coconut oil and 4 T raw cacao powder (you can add a splash of vanilla in you want) with 1-2 T of maple syrup or monkfruit. You may need to double this recipe.
2. Use 2 spoons to roll each square in the mixture, sprinkle with pink salt and rose petals (or coconut!) and set on parchment into fridge or freezer to set for about 15 minutes.
3. Devour.

**these keep in the freezer, and honestly taste best straight out of the freezer, for 3-4 weeks**

Want more recipes? Check out my chocolate fudge ball recipe and my raw date + nut bites.

If you’re in the Boston area and would like to order custom desserts I am now accepting orders! Fill out this form to get started. Perfect if you’re wanting to reduce refined sugar in your diet, want healthier desserts for you and your family, or need a dessert to bring to an event.

Not sure where to start on your health journey? Schedule a free phone consultation here.

LUSCIOUS BATH BOMB RECIPE

Helloooo and Happy February!

So, my latest obsession is taking baths. Partially because it’s frigid out, partially because the epsom salts I add to my baths draw out Lyme toxins, mostly because they are sooo relaxing. It’s safe to say I’ve dropped a pretty penny on bath bombs in the past few years so I decided to take a stab at making my own. I found this recipe on Wellness Mama’s blog and adapted it a little bit. Try it for yourself if you’d like!

You can make these bath bombs just in time for Valentine's Day. If you’re spending the night solo (or with a loved one!) this is a great way to indulge and treat yourself on what can sometimes be an overwhelming and emotional day. It bothers me that Valentine’s Day is marketed to those of us that are paired off. Why do couples get to have all the fun, right? I’ve personally always loved February 14th. In elementary school we got to make tissue box mailboxes and everybody would get a valentine no matter what. We had big classes where I grew up so I got up to 35 one year. In middle school my girlfriends and I used to get each other romantic gifts like roses that sang and a box of heart shaped chocolates so we wouldn’t feel left out. 

A lot of people hate on Valentine’s Day because it’s a made up holiday. So why celebrate it? Well, I’m definitely not one to complain because I love any excuse to celebrate love! I do however believe there needs to be more attention put on single peeps too. V-Day is a day of love right? So why NOT practice unapologetic self-love on this day in every way possible? You don’t have to be left in the sad Necco heart message dust. If you don’t have plans on February 14th consider spending an evening of indulgence with yourself. Cook a gourmet dinner, grab your favorite book or turn on a rom com, paint your nails, give yourself an Ayurvedic self-massage, smear on a face mask or hell a whole body mask and take a luxurious bubble bath. Also, you totally don’t have to be alone - call your girlfriends over for a proper Galentine’s Day, Parks and Recreation style.

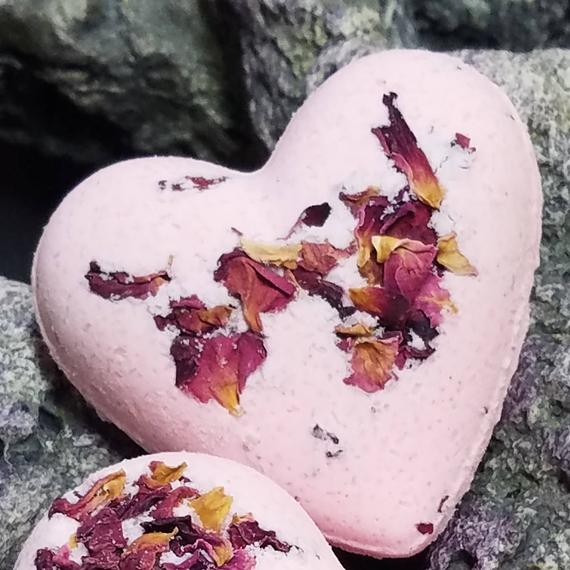
If you decide that a bath is in your future try out this bath bomb recipe (or go buy one at Lush). And if you want to be extra like me you can add bubbles, rose petals, thin slices of citrus, or 1/2 cup of raw oats to your bath, light a candle, turn on chakra meditation music or Alt-J, sit back and relaxxxxx.

https://www.etsy.com/listing/521075670/rose-bath-bomb-heart-shaped-bath-bomb

Luscious Bath Bomb Recipe

Ingredients

  • 1 cup baking soda

  • 1/2 cup citric acid

  • 1/2 (unscented) epsom salt or himalayan pink salt

  • 3/4 cup cornstarch (ideally organic)

  • 2 tbsp oil of choice (I like fractionated coconut oil or olive oil)

  • 2 tsp witch hazel (or water or rose water) plus a little more if needed

  • 1 tsp vanilla extract (or more water)

  • 30-40 drops of essential oils (I like a combo of lavender, rose and jasmine)

  • Optional: dried herbs like rose, chamomile, hibiscus or lavender


Tools

  • Heart silicone mold or muffin mold or donut mold

  • Mixing bowl

  • Spray bottle

Instructions

  1. Combine dry ingredients (baking soda, salt, citric acid, and cornstarch) in a large bowl and mix well until combined. Add optional dried herbs at this stage.

  2. In a small bowl, combine the oil, witch hazel and vanilla extract and stir well. Add essential oils.

  3. Add the liquid ingredients to the dry ingredients a few drops at a time. Mix well with hands (wear gloves if you have sensitive skin).

  4. Mixture should hold together when squeezed without crumbling. You may need to add slightly more witch hazel if it hasn’t achieved this consistency yet. I recommend using a spray bottle with additional liquid to evenly add.

  5. Quickly push mixture into molds (heart-shaped are adorable for Valentine’s Day), greased muffin tins, donut tins or any other greased container. Press in firmly and leave at least 24 hours (48 is better) or until hardened. It will expand some and this is normal. You can push it down into the mold several times while it is drying to keep it from expanding too much. Using the metal molds will create a stronger and more effective final bath bomb.

  6. When dry, remove and store in airtight container or bag. Use within 2 weeks.

  7. Voila!

Have you ever made bath bombs? Let me know if you end up making these! I’d love to see the final product. If you want more support and are interested learning self-care tips to keep yourself balanced I can help with that. You can schedule a complimentary call here and together we’ll find a program that works for your goals and your budget. XO.

PUMPKIN PIE SMOOTHIE

PSLsmoothie.jpg

It’s pumpkin season baby! If you’re still holding onto your beloved coffee shop pumpkin spice latte it’s time to swap it out for this pumpkin pie smoothie. I’m not going to go into how terrible PSL’s are for you, how full of sugar they are or how many calories they are. I’m not. What I am going to go into is the health benefits of this pumpkin pie smoothie I just made, which can also be a smoothie bowl by the way.

Since you know I like to eat functionally aka every ingredient has a purpose, I thought I’d break down a few top ingredients and their health benefits below for my fellow food geeks.

Bananas are made of 76% water and are packed with vitamins such as vitamins C and B6 and minerals such as potassium, copper, and manganese. This high water/nutrient ratio makes them a great electrolyte food perfect for busy moms, workout enthusiasts, and people on the go. Bananas are also an excellent “brain food” great for heavy thinkers and are known to help build strong muscles as well as strengthen the nervous system.

Pumpkins are an excellent food for aiding weight loss and for reducing cholesterol. The high amount of phytonutrients in pumpkin have been shown to help prevent the risk of cancers, particularly mouth, lung, and colon cancer. Pumpkin also contains several anti-aging benefits and the antioxidants help to keep skin wrinkle-free and radiating a healthy glow.

Pumpkin Pie Spice is made up of Cinnamon (rich in cell-protecting antioxidants and there is also some research to support that cinnamon may help diabetics better control blood sugar), Nutmeg (boasts small amounts of fiber, numerous B vitamins and minerals), Ginger (contains important minerals like iron, potassium and zinc. It may also help relieve minor digestive problems), and Allspice (reduces inflammation, aids in digestion, boosts immunity, improves health of teeth, protects heart, improves circulation, and is high in antioxidants). Word of caution: if you have existing gastric ulcers or ulcerative colitis, it is best to avoid using allspice, as it can exacerbate the conditions.

PUMPKIN PIE SMOOTHIE

Ingredients

  • 1 cup non-dairy milk - I used unsweetened almond milk or coconut milk

  • ½ cup canned unsweetened pumpkin (preferably organic)

  • ½ or 1 frozen banana (depending on how sweet you want it) or you could use an unfrozen banana and a few ice cubes

  • 1 tbsp pumpkin pie spice or make your own using the recipe below

  • Optional: 1 scoop Vital Proteins Collagen, 1/2 tsp ashwagandha, and/or 1 scoop vanilla protein powder

    Make your own Pumpkin Pie Spice:

  • ¼ teaspoon ground cinnamon

  • ⅛ teaspoon ground ginger

  • pinch ground nutmeg

  • pinch ground cloves

  • pinch all spice

Directions

  1. Place all ingredients in a high speed blender and whiz up until smooth. Pour in your favorite class, stick in an earth-friendly glass straw, top with some crunch and enjoy!

  2. If you want to make this into a smoothie bowl, add 1/2 the amount of milk so it’s thicker and more spoonable, pour into a bowl, and top with pumpkin seeds, unsweetened coconut shreds, cacao nibs, and blueberries.

If you’re interested in getting more support with cooking healthy in your kitchen I am offering meal planning packages that are personalized for you based on your goals. Whether you’re trying to gain weight, lose weight, follow a paleo, Whole30, AIP, vegan, vegetarian, leaky gut, prenatal/postnatal, kid friendly, etc. protocol I can help. Schedule a free consultation by clicking here.

Resources:

https://www.foodnetwork.com/healthyeats/recipes/2016/10/health-benefits-of-pumpkin-spice

https://www.organicfacts.net/health-benefits/herbs-and-spices/allspice.html

Medical Medium aka Anthony William

WHAT IS A CACAO CEREMONY?

Have you ever heard of ceremonial cacao? 

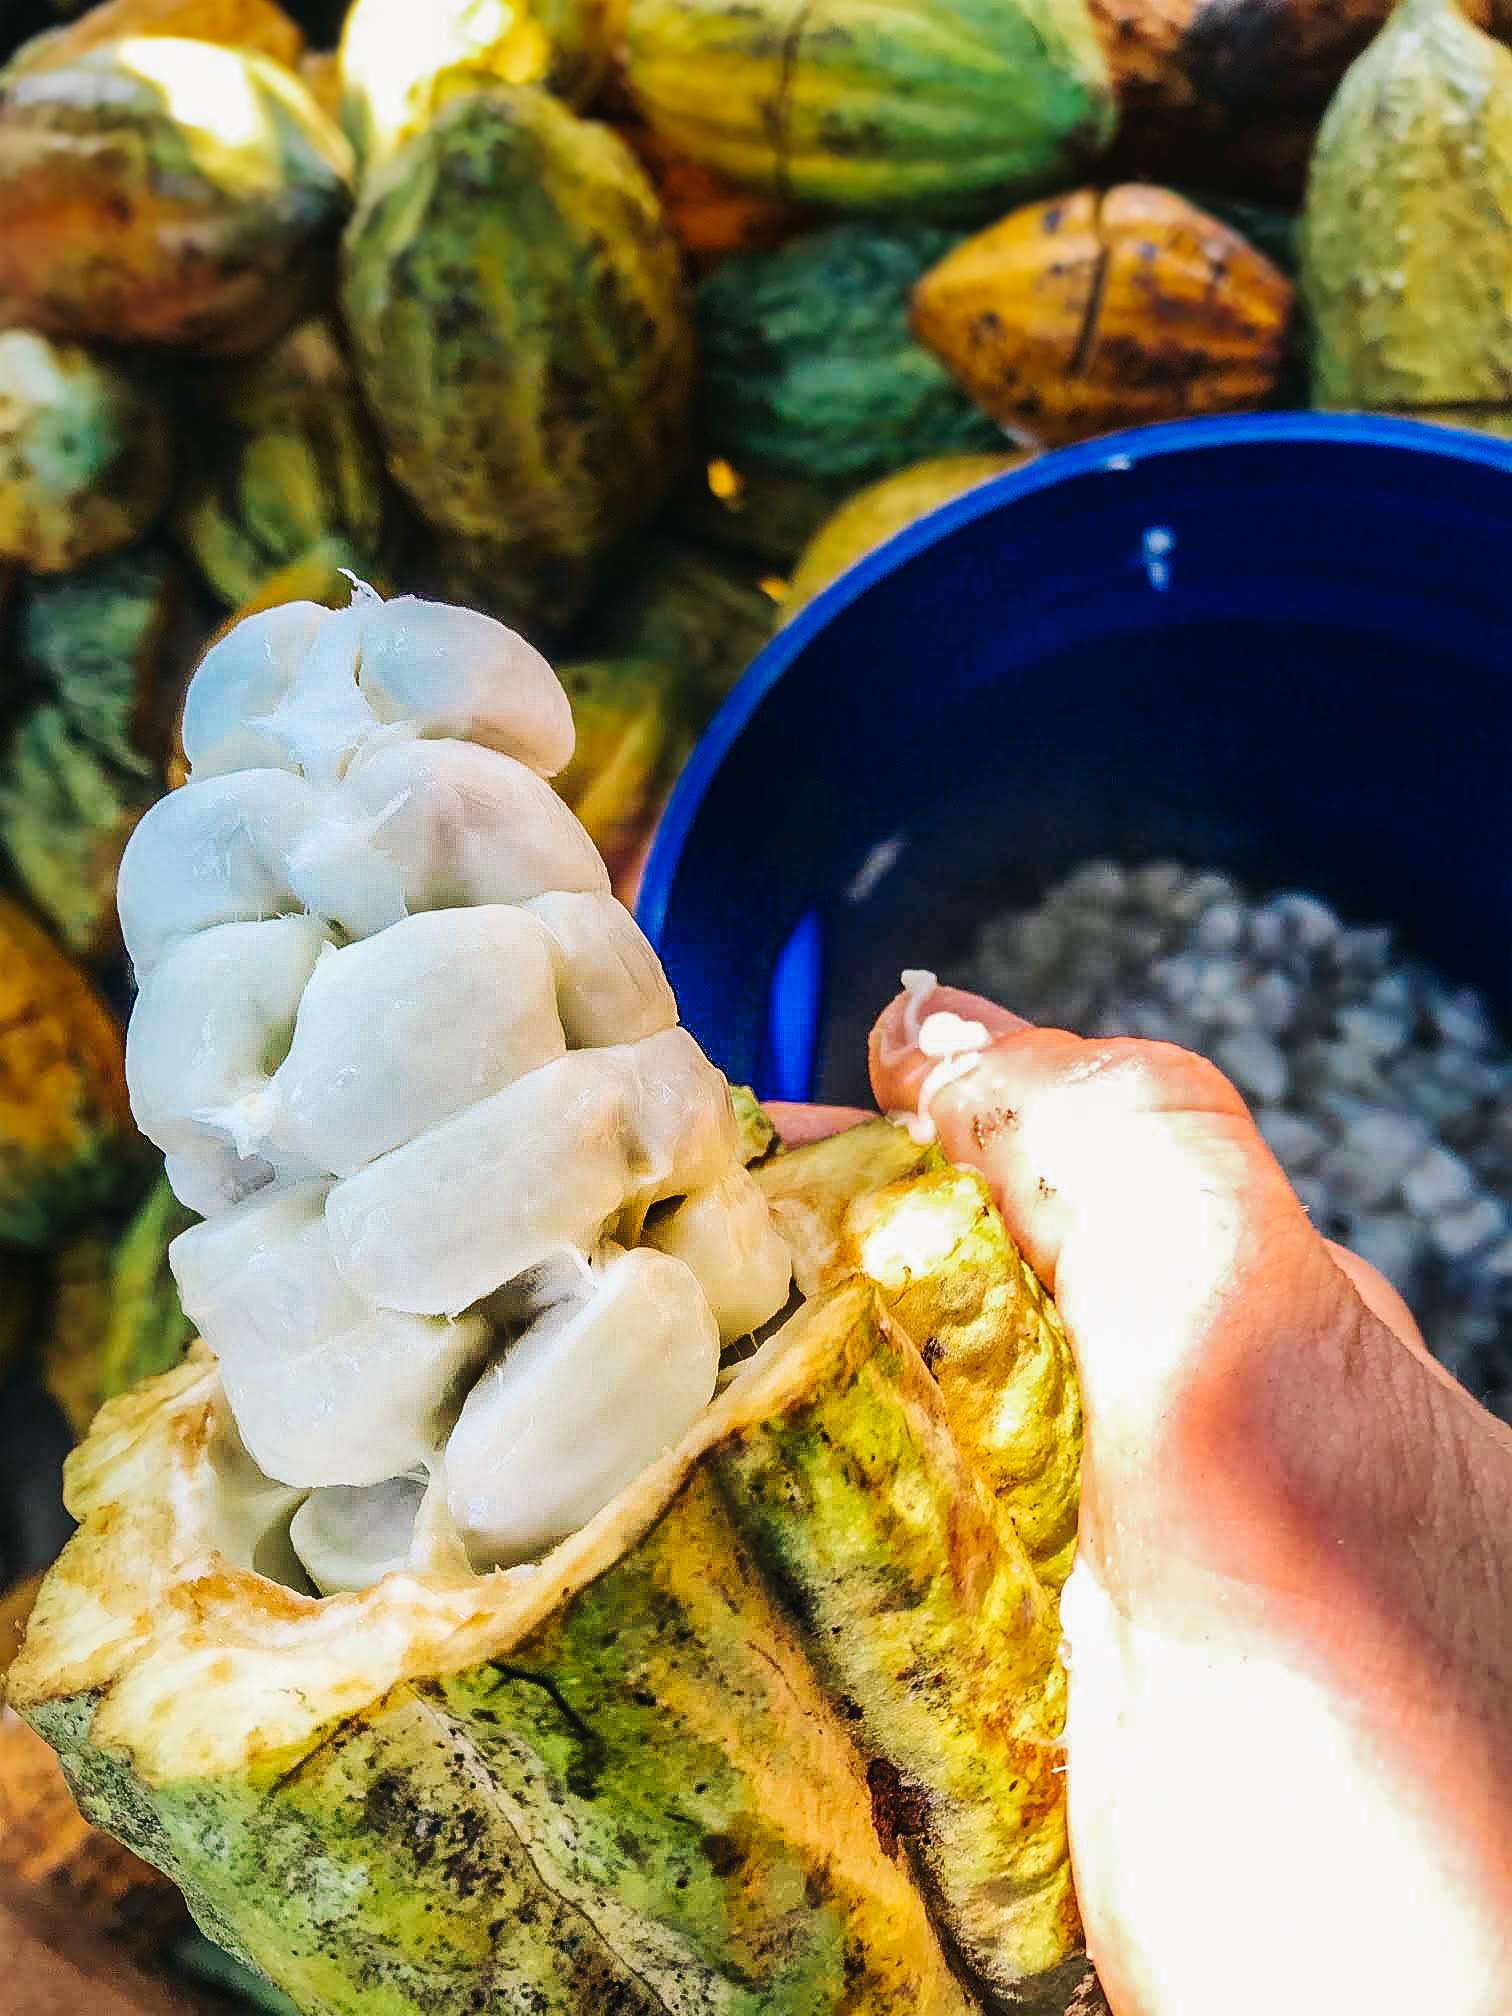
For thousands of years ancient tribes have considered cacao as a sacred plant with healing properties. Not only was cacao used in ceremonial settings but it was also renowned as a medicinal plant that aids in the healing of and opening up of the heart's circulation. Because of it's heart opening qualities cacao is a perfect pairing with meditation, yoga, dancing, and therapeutic work such as reiki. It facilitates greater connection to other people and to yourself. It's sure to add a certain sacredness to your personal practice and a buzz to your social gatherings. 

Ceremonial cacao is not the same as regular chocolate. It wasn’t until Europeans came across it and brought it home that sweetener was added and what we now know of as chocolate was created. Today, chocolate is usually laden with extra ingredients such as sugar, milk and preservatives and people often see it as either a guilty pleasure or junk food. Chocolate still gives us that feel good effect but the medicinal properties are close to none because so much of the good stuff (aka the fat) is stripped away.

My first ever cacao experience

The first time I tried cacao was not intentional. I was at an open house at Brooklyn Boulders in Somerville about 5 years ago. There were vendors, activities, art and climbing of course. My friends and I heard there was a cacao ceremony in the yoga room so we decided to try it out. We walked into a PACKED room of people sitting on the ground, cross-legged, waiting for the ceremony to begin. Behind us was a table with a large cauldron filled with what I presumed to be a hot chocolate-y drink. A gentleman stepped into the middle of the space and said a few words before we lined up for our mini cup of cacao. It was a teensy serving, making me wonder what I was getting into. I knew this was a "ceremony", but wasn't sure what I was going to feel. I had heard that ceremonial cacao can interfere with certain anti-depressants which, even though I wasn't on any, as somebody with anxiety this made me a bit anxious. Once everyone received their cup and sat down, we all closed our eyes and meditated on the cacao in our hands.

After drinking the cacao, which was super thick and bitter (it's pure, with no additives so it's tastiest when mixed with maple syrup or honey) we were prompted to yell out something nice about somebody else in the room. The silence quickly turned into a buzz of positivity, love, and laughter. It was beautiful. But I didn't feel anything different per se. I was mostly just excited about drinking chocolate in a guilt-less setting. After about 30 minutes I had a huge burst of energy and started doing headstands (because I just learned how to) on repeat. I felt so good! The cacao elicited euphoria and body high which was reminiscent of an illegal drug, a mixture between a stimulant and a psychedelic. It was something else. That was about 5 years ago and I hadn't thought about ceremonial cacao until just recently.

The Spirit awakens

My yoga teacher and mentor started posting about her daily morning cacao rituals at home and to say the least I was intrigued. I was surprised she was drinking this stuff everyday! Was that okay? It seemed intense judging by my last experience. Following my curiosity she brought me a cacao elixir before one of her yoga classes. I chugged it because, well, it was a chocolate drink and felt like such a treat. I have to say that was one of the most powerful yoga classes I've taken in since my yoga teacher training days. My heart burst open and tears streamed down my face with emotions of happiness, lust for life, wanting, passions of pursuing my work, and a new devotion to my dharmic commitments.

I came home on such a high, immediately had a coaching call with one of my clients which I absolutely nailed because I was so OPEN. I could distinctly sense a deeper connection to my client in ways I haven't been able to prior. After the call I sat down and created a comprehensive plan for a Silent Disco yoga event... something that would have felt like pulling teeth just yesterday. This stuff was intense. It was a lot to come down from because I was so stimulated from the cacao properties. I realized I had too much. I drank 1 oz of cacao. After having my free 10-min consultation with Jonas from Firelfy Chocolate (now Ora Cacao) I knew that I only need 1/4 to 1/2 oz until I can hear the invitation of the cacao plant inviting me to go deeper into my practice. 

Continuing my journey

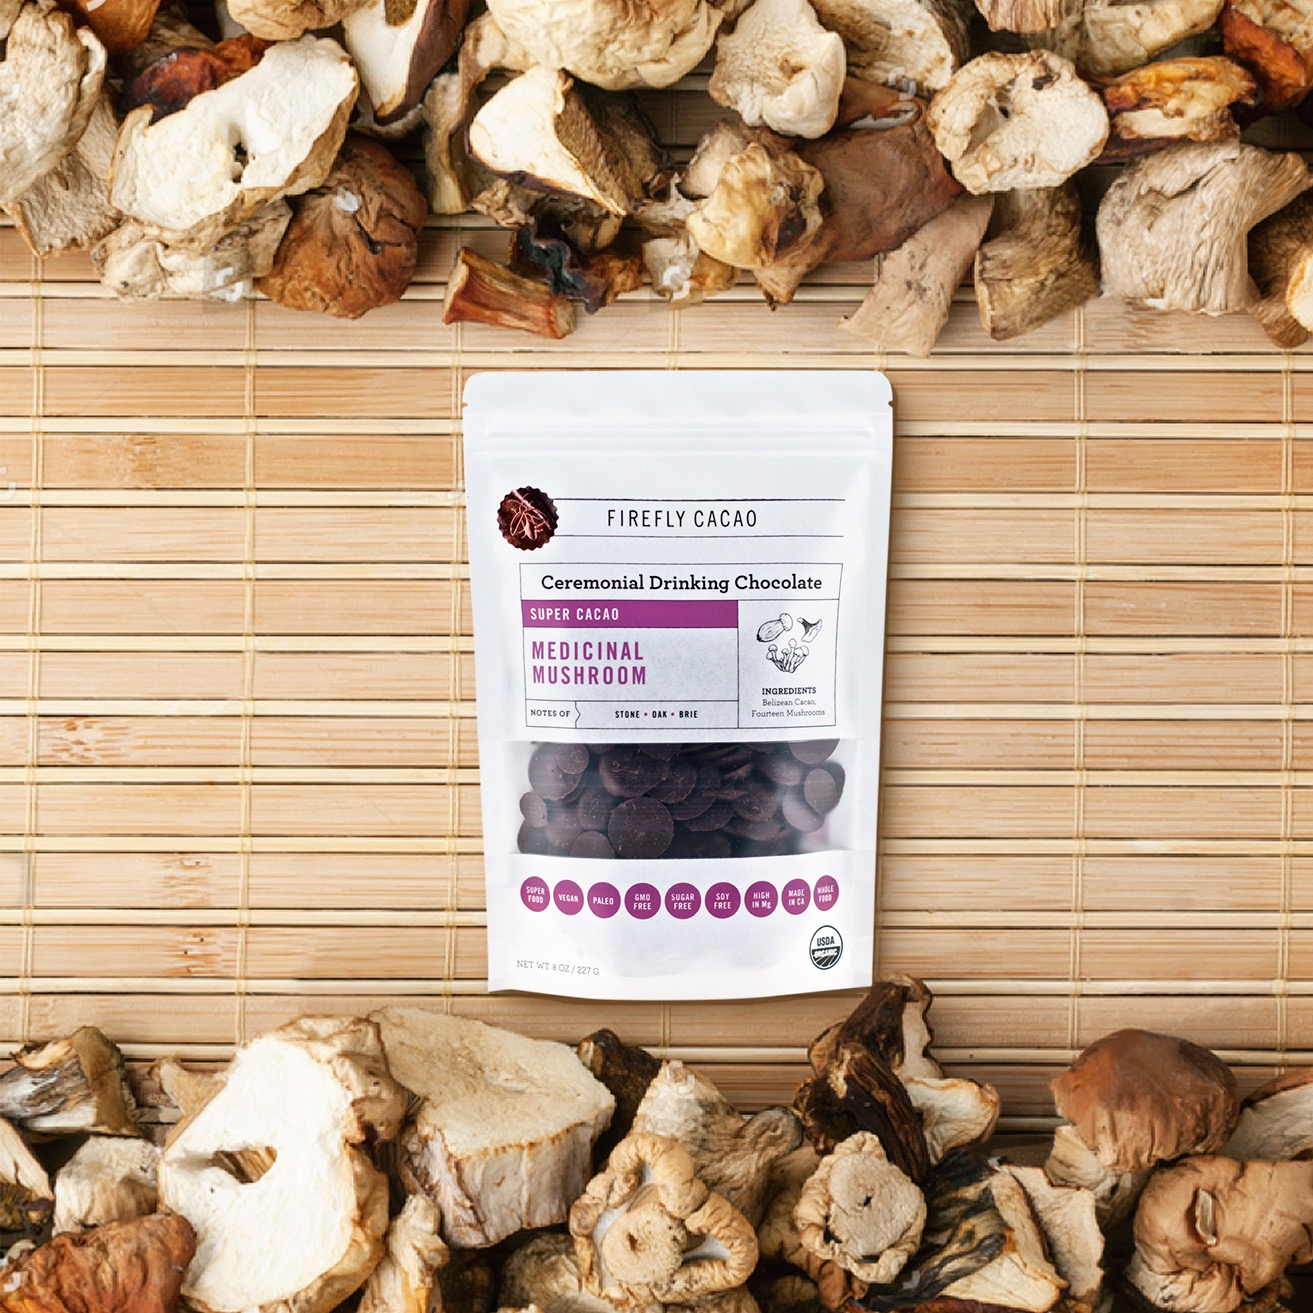
There are a few cacao brands out there - my teacher recommended Ora Cacao. I love the one that’s blended with rose blossoms for an extra heart-opening experience. I cherish the process of making cacao, pouring it in my favorite mug, creating my own little ceremony and meditating as it enters into my bloodstream. In my latest solo cacao ceremony I was dancing my ass off in my living room, rapping my own lyrics (I so wish I recorded myself), and gardening. All things that I haven't done but wanted to do for so long. Especially rapping.... ha! Actually I've been putting off planting my garden and thanks to cacao now I have little kale sprouts! Let me walk you through how to host your own cacao ceremony.

Click the image for 10% off

Click the image for 10% off

How to Host Your Own Cacao Ceremony

You can host a cacao ceremony at home by yourself for a more introspective experience or with friends to increase intimacy and cultivate a deeper connection with the ones you're with.

  1. Start with 1/4 oz of cacao if this is your first time. Use this link to get 10% off any Ora product. You can drink up to 2 oz but personally even 1 oz was too much so I really recommend starting slow and building up as you get to know the plant and how you interact with it.

  2. Mix cacao with hot water, mix and drink or create a cacao elixir by following the recipe below. Do not mix with cow's milk as it will not work properly because of the fat content. I like mixing in Sun Potion Ashwagandha (5% off here) and Sun Potion Chaga (5% off here) for added stress-busting benefits. You can read more about Adaptogens in my blog post here.

  3. Cacao takes 20-30 minutes to take effect and can last about 3-5 hours depending on the person and dosage. Eat lightly prior to drinking cacao to increase absorption.

  4. If you're drinking alone, sink into the energy and go where you need to. Whatever you're feeling will be heightened. Deeper meditation, abundant creativity, increased happiness. If you're drinking in a group it's nice to drink together in a circle, maybe even sharing the same mug. In both instances it's nice to create space, acknowledge the plant you are about to drink and bow in honor of the upcoming experience. You could even go around the circle and check-in, share names and say one thing you are grateful for. From there, the magic of cacao does the rest and you can enjoy the buzz!

  5. Drink plenty of water in the later stages of the ceremony and afterwards. If you want to ground after, eat some food, dense food works well. Some people may experience a mild headache or nausea - don't fret, just drink too much water and drink a little less cacao next time.

  6. Even though there are a few contraindications (please do more research on your own, this article is meant to be more of an overview) it's important you take fear out of the equation. It can be scary to try something new, especially if you are sensitive to coffee and stimulants but just take it slow and know that you are safe and no harm can come of this experience. If you want to discuss this further I'm happy to chat!

Click the image and use code NATASHAWELLNESS for 5% off

Click the image and use code NATASHAWELLNESS for 10% off

Cacao Elixir Recipe

Ingredients
1/4 oz to 1 oz Ceremonial Cacao (I use Ora - use this link for 10% off. You also get a free 10 minute call with Jonas where you can ask him anything about cacao. Definitely take advantage of this!)
1/4 tsp Ashwaganda powder (click to get 5% off)
1/2 tsp Chaga mushroom powder (click to get 5% off)
1/2 to 1 tsp maple syrup or sweetener of choice
Dash of cayenne
8oz hot water
Optional: 2 scoops Vital Proteins Collagen (adds creaminess and frothiness, not a vegetarian product)

Directions
Blend on high for 2 minutes. If you don't have a blender you can use a handheld frother but the drink won't come out as frothy.


Benefits of Cacao

  • 40 Times the Antioxidants of Blueberries.

  • Highest Plant-Based Source of Iron.

  • Full of Magnesium for a Healthy Heart & Brain.

  • More Calcium Than Cow's Milk.

As a health and wellness coach I offer a variety of services from delicious elixir recipes, customized meal plans, one-on-one coaching, and (Boston area) personal chef meal delivery. If you are feeling lost, unmotivated, want to have more energy, feel more connected, uplifted and overall more at peace with your life and body schedule a free consultation with me here. I look forward to meeting you!

Have you ever tried ceremonial cacao or attended a cacao ceremony? I'd love to hear your experience!!

Resources:
www.flykakao.com
www.ceremonial-cacao.com

GOLDEN MYLK + OJAS NIGHTLY TONIC

My newest SNACK obsession is golden mylk and an ojas nightly tonic (spelt with a Y because it's not actually dairy milk, but rather nut mylk) because they are as satisfying as a snack but don't interrupt my body's digestion process between meals. I'm the kind of person who craves something sweet after dinner so this is the perfect remedy. Not only because it's filling and satisfyingly sweet but it also helps wind my body down after a long day and prepares me for sleep. Both drinks provide similar effect. The golden mylk is more anti-inflammatory so it's good for athletes or for those with inflammation. In the Ayurveda world, turmeric is considered “tri doshic,” meaning it’s suitable for all dosha types (hooray!) When combined with other activators—such as cardamom, cinnamon, or pepper—it’s known for increasing ojas, or the body's vital strength. During both acute and chronic experience of stressors, turmeric supports healthy skin, liver function, healthy levels of body weight, blood glucose, cholesterol, corticosterone, memory, and reduced glutathione. The ojas tonic is even more building and can be good for those that feel depleted, lethargic, tired, frail, sickly, and ill. Try both and let me know what you think!

golden-milk.jpg

GOLDEN MYLK

Serves: 2

INGREDIENTS
1 1/2 cups light coconut milk (canned is best, but carton works too)
1 1/2 cups unsweetened plain almond milk (DIY or store-bought) 
1 1/2 tsp ground turmeric
1/4 tsp ground ginger
1 cinnamon stick (or 1/4 tsp ground cinnamon)
1 Tbsp coconut oil or MCT oil (optional)
Pinch ground black pepper (helps activate the curcumin)
Sweetener of choice to taste (stevia or maple syrup)

DIRECTIONS

  1. To a small saucepan, add coconut milk, almond milk, ground turmeric, ground ginger, cinnamon stick, coconut oil, black pepper, and sweetener of choice.

  2. Whisk to combine and warm over medium heat. Heat until hot to the touch but not boiling - about 4 minutes - whisking frequently.

  3. Turn off heat and taste to adjust flavor. Add more sweetener to taste or more turmeric or ginger for intense spice + flavor.

  4. Serve immediately, dividing between two glasses and leaving the cinnamon stick behind. Best when fresh, though leftovers can be stored covered in the refrigerator for 2-3 days. Reheat on the stovetop or microwave until hot.

*If you don't have coconut and almond milk you can sub using 3 cups of any unsweetened nut, flax, hemp or coconut mylk.
Adapted from Minimalist Baker


basket-book-books-6332.jpg

OJAS NIGHTLY TONIC

Ojas simply meals "life-force". Eating foods that provide ojas in combination with a balanced lifestyle will support immunity, sleep, vitality, complexion, mood stability, and longevity. 

INGREDIENTS
1 cup nut, coconut, flax, or hemp mylk
1 tbsp chopped dates
2 tbsp chopped almonds
1 tbsp coconut meat or flakes (unsweetened)
1/2 tsp saffron
1-2 tsp ghee
1/8 tsp Cardamom
1 tsp raw honey
Optional: 1/8 tsp Ashwagandha

Directions

  1. Add all ingredients except honey to one cup of mylk as you slowly bring it to a boil. You may need to use a small whisk or fork to make sure the herbs combine with the liquid.

  2. Once the milk, herbs, food, and spices are cooked and off the flame, add raw honey. 

If you are looking for healing support from a health coach schedule a free phone consultation here.

Services I offer:

  • One-to-one coaching

  • Customized meal planning

  • Ayurvedic cleansing (no starvation here!)

  • Prepared meal delivery in the Boston Area

I can’t wait to talk to you!

RAW DATE + NUT BITES

date and nut bites.jpg

I'm back! Excuse the hiatus my friends. I've been working on finding the right balance as my health coaching business picks up. February was a super busy month for me - I gave 3 lectures on Ayurveda + Digestion at 3 different spots throughout Framingham and Belmont. If you missed it, there is a Facebook Live recording on my Facebook page. With all the free lectures I had planned this month I was on a mission to create a scrumptious little something to share with my attendees. I'm kind of obsessed with feeding people surprisingly healthy snacks. Enter: my raw date + nut bites. I'm very happy to say that through my many iterations, I'm finally ready to share my favorite recipe with you!

I've made versions of these bites with no dates, 2 cups of dates (way too sweet!) and have found the sweet spot: 1 cup. If you don't have dates hanging around you can substitute 2-4 tbsp maple syrup or honey. Just not agave please. Agave is bad. Take it from Dr. Oz himself. The sweetness content is all about your own preference so add a little and increase as you go. You can always add but never take away! 

If you're allergic to nuts use seeds (pepitas, sunflower, flax, hemp, etc.) instead of nuts, sunflower butter or coconut butter instead of almond butter and soy, flax, or hemp milk in place of the almond milk. 


Raw Date + Nut Bites

Prep: 10 mins. Makes: 24 bites

INGREDIENTS
2 cups of your favorite nuts and/or seeds
1/4 cup almond butter
1 cup pitted dates
2 tbsp melted coconut oil
1/8 cup almond milk
1/2 tsp sea salt

DIRECTIONS

  1. Soak pitted dates in boiling water for a few minutes (cover to speed up process).

  2. While dates are soaking place all ingredients in a food processor (or blender).

  3. Remove dates from water and add to the food processor. Discard water.

  4. Blend until a dough forms. You may have to add almond milk 1 tsp at a time until the right consistency is reached. (I like mine super doughy so you can hardly see the nuts and seeds.)

  5. Use a scoop or hands to form bites and place on sheet pan.

  6. Refrigerate bites for 30-60 min. before transferring to a glass tupperware container.

  7. Refrigerate for 1-2 weeks or freeze for 2-3 weeks. The worst thing that will happen to your bites is they will dry out a little, no big.

"In Ayurveda dates are considered a ‘superfood’ because they are both Sattvic (promote peace in the mind) and directly nourish Ojas (the essence of our immune system). They are considered a nutritive tonic for the body - energising for the tissues and immune system. But they are also considered heavy and difficult to digest so eating just 1 or 2 a day is more than sufficient, otherwise they may overtax your Agni. Dates are often used as medicine in depleted plasma tissue (rasa dhatu) conditions and are also used as a tonic in the case of lung (pranavaha srota) problems. They are also useful in the case of low libido or infertility, helping to nourish and invigorate sexual reproductive tissues (shukra dhatu)." ~Mudita Institute

Easy peasy right? Experiment by adding in cinnamon, vanilla extract, and different nuts and seeds. Let me know how they come out!

VEGAN CHOCOLATE FUDGE BALLS

fudgeballs3.jpg

Well it’s official: the holiday season is officially in full force, and so with it comes cakes, pies, and seemingly endless sweet treats surrounding us left and right. It’s easy to get wrapped up in the “cookie coma” cycle and eventually find yourself tired (literally) of the same old sugar-packed desserts.

When I’m ready to kick off my holiday baking, I start with one of my fave tasty treats—my dark chocolate fudge balls—which not only satisfy my sweet tooth, but also give me the energy to keep on keeping on throughout all the holiday hustle and bustle. Fuel for the body + soul 😊 And the best part? No actual baking required!

Stay tuned for more mind-body friendly recipes for your dessert tray this season. And to learn more about other foods that boost your energy and support your health, visit https://www.natashawellness.com/healthcoaching/.

Now onto the good stuff. Cheers and happy “baking,” my chocolate-loving friends!

fudgeballs1.jpg

Dark Chocolate Fudge Balls

Prep: 10 mins. Makes: 24 bites

INGREDIENTS
1/2 cup oats
3 tbsp nut butter
1/4 cup + 1 tbsp raw cacao powder (not cocoa powder)
1 tbsp cocoa nibs
1 tbsp + 1 tbsp unsweetened coconut shreds
20 dates

DIRECTIONS

  1. Grind oats in food processor until it becomes a fine powder

  2. Soak pitted dates in boiling water for a few minutes (cover to speed up process).

  3. Add remaining ingredients (except for extra 1 tbsp of cocoa powder and coconut flakes) and blend until combined, scraping sides a few times

  4. Shape into small balls and roll into the extra coconut flakes and cacao powder. Sometimes it's fun to make a few different sizes. Then you can grab a few little ones or one big one.

fudgeballs2.jpg

PUMPKIN SPICE GRANOLA

bowl-breakfast-cereal-bowl-949069.jpg

As summer ends and fall lands upon us, some of us are feeling the sting as we let go of the sun and sand and slow-setting sunlight. While summer certainly has its share of cool treats, October brings to light a few things that help me adjust to the shift in season: the bright colors of the leaves, cozy, hygge-friendly mornings with a soft throw and cup of cocoa, comfy sweaters and scarves. Most notably, Fall begins the flavor craze for…wait for it…pumpkin spice!

Ah, pumpkin spice. Your return is welcomed by so many! What better way to warm your soul and start your morning than the warm notes of cinnamon, clove, ginger, nutmeg, and allspice—the pillars behind what makes this treat a classic (yet healthy) comfort food. Not to mention a delicious incentive for inching yourself out of bed in the morning.  

Not only is pumpkin beautiful in its shape, color, and taste, it also packs valuable nutritional benefits that help protect our bodies during the cooler temperatures. According to Ayurveda, ripe pumpkins can reduce Pitta energy while also helping to balance Vata. Although pumpkin is somewhat cooling, this quality is reduced when it is cooked, especially with ghee (avoid unripe pumpkins, as they are hard to digest and can aggravate all three doshas). Traditionally, pumpkins are believed to sharpen the intellect and induce calm, and so they are used for various mental imbalances and to reduce stress and agitation.

Due to its rich anti-oxidants like vitamin A, vitamin C, and vitamin E, pumpkin helps to balance out the metal element of the Fall season and prevent illnesses (Weaknesses in the lungs and large intestine often arise this time of year as allergies, asthma and constipation)

Pumpkins are sweet and grounding, corresponding to the earth element; therefore, relieving dampness and supporting digestive, respiratory, and overall health. It also contains fiber (balances blood glucose levels) and the minerals magnesium and potassium, which help to balance blood pressure and relax muscles, protecting the circulatory system.

Pumpkin also contain anti-inflammatory omega-3 fatty acids in the form of alpha-linolenic acid. Pumpkins are detoxifying, working to clean the bladder and surrounding organs.

So before another season sneaks up on us, let’s make the most of the calm before the cold. Now round up your best sweater and leggings and go get your pumpkin on 😊.

Without further ado, introducing the star of the show today: pumpkin spice granola.


Pumpkin Spice Granola

Ingredients:

3 cup oats
¾ cup your favorite dried fruits (ex. bananas, cherries, raisins, apricot)
1 cup pumpkin seeds
1 cup your favorite nuts and/or seeds (ex. almonds, pine nuts, cashews, walnuts, flaxseeds)
¼ cup honey
¼ cup coconut oil
1 tbsp pumpkin spice
1.5 tsp vanilla extract
Pinch of salt

Directions:

  1. Combine dry ingredients

  2. Combine wet ingredients

  3. Combine both dry + wet ingredients

  4. Bake at 350 for 15-20 mins

  5. Let cook before eating. Store in fridge for 7 days and sprinkle on yogurt, oats, or just eat it straight up!

Having trouble finding your way around the kitchen? Not sure what ingredients to use in order to make yourself the most nutritious food? Schedule a free conversation with me at www.natashawellness.com/appointment and let's chat about your health goals.

Resources: http://everydayayurveda.org 
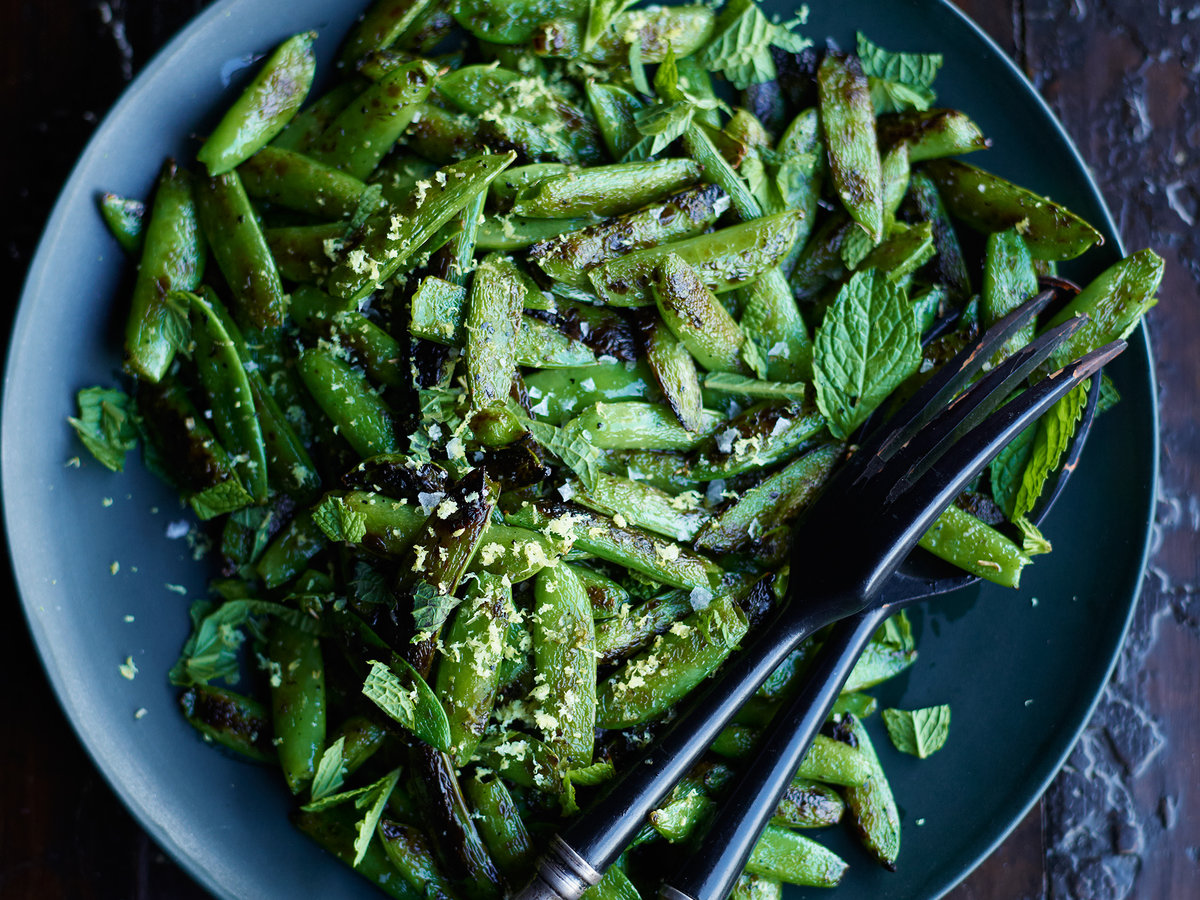
BLISTERED SUGAR SNAP PEAS

Photo Credit: Food & Wine Magazine

Photo Credit: Food & Wine Magazine

No longer are peas considered the unpleasant soggy side dish mom poured from a can when something green was needed with our dinner. With nutrients like vitamins C, K, and A, folate, fiber and protein, sugar snap peas make the list as one of my all-time favorite veggies. A very versatile—sometimes even fancy—little addition to my present-day plate. And because of their high-water content (90%!), you’ll get a nice, crispy crunch in every bite. And fear not having seconds. These little pods are packed with enough water to keep you both hydrated and feeling fuller longer on few calories—make that 26 calories per cup!

Sweet peas (and string beans) are among the most easily digestible beans, and are thus an important source of fiber and protein. They can help you stay regular and feel satisfied after meals. Their naturally cooling properties are soothing to Pitta. 

Below is my version of a similar dish I was taught to make at Barcelona Wine Bar in Brookline—and it’s so YUM! Ready for another plus of these little guys? They’re done in a snap! Now that’s what I call easy peasy 😊. To check out more recipes, simply scroll down. If you want to learn more about what foods are right for your body, let's have a conversation. Schedule a 30 minute free consultation call at natashawellness.com/appointment.


Blistered Sugar Snap Peas

Makes 2 servings

Ingredients
1 lb bag sugar snap peas
1-2 tsp toasted sesame oil
1 tbsp. toasted sunflower seed (or chopped peanuts)
1/2 tsp za’atar
½ tsp salt
Pinch of finishing salt (I like himalayan pink, sea, or pyramid salt)

Directions
1. Toast seeds or nuts on medium heat; set aside.
2. Add oil to pain on high heat.
3. Add peas, cover and cook, shaking pan until blistered on both sides.
4, Add salt while cooking. Peas are ready when blistered and brown.
5. Plate peas and sprinkle with seeds, finishing salt, and za’atar.

Side note: it would be tastier with peanuts but healthier with seeds


Resources:
Fruits & Veggies More Matters
http://www.fruitsandveggiesmorematters.org/about-fruits-and-veggies-more-matters
Sweet Peas

https://www.joyfulbelly.com/Ayurveda/ingredient/Sweet-Peas/123

CHA-CHA-CHA CHIA PUDDING

Who said pudding can’t be healthy? Especially when you add a power ingredient like chia—beyond healthy! From an Ayurvedic perspective, chia has several doshic benefits. It reduces vata—the air and space element, optimizes pitta—the fire element, and nourishes kapha—the water and earth elements.

Chia seeds are also sattvic, or pure in nature, meaning that they foster clarity and tranquility of the mind, while also nurturing the body.  According to Ayurveda, the chia seed creates a natural warming effect within the body-mind aura, enhancing cognitive health, a balanced metabolism and even joy. What a superfood hero! This is just one example showing how our diet can affect the body and mind, one of the basic principles of Ayurveda.

Chia seeds support deep hydration and have high quality fiber, helping to improve and conserve our ojas (inner strength and vitality). Adding even more super power with their large amounts of Omega-3 oils, chia seeds help conquer inflammation and control blood sugar.

Don’t yet believe the benefits? The proof is in the pudding!


Protein Packed (Chia) Pudding

Makes 4 servings

Ingredients:

1.5 cup carrageenan-free almond milk or homemade nut milk
1.5 cup pure coconut water (or just use double the milk if you have no coconut water)
1/2 cup chia seeds
1/2 cup oats
1 tbsp flax seeds (I like to grind my own in a coffee grinder)
1-2 tsp good cinnamon
4 scoops collagen peptides (the BEST protein boost, but optional if you are a veg. you can also use the marine collagen)


Directions:
1. Combine all ingredients in quart sized mason jar, collagen last (or else it will congeal all your chia seeds).
2. Shake vigorously. then shake again after 5 minutes. Then shake again after another 5 minutes.
3. Stick it in the fridge overnight.
4. Divide into clear glasses or jars, top with berries, stewed apples, banana, coconut, and/or my favorite - paleo granola.
 

Resources:
Yoga Journal: https://www.yogajournal.com/lifestyle/doshas-decoded-learn-unique-mind-body-type#gid=ci02075699b0132620&pid=woman-doing-chandra-bhedana-moon-breath-pranayama-nadi-shodhana 
La Yoga: https://layoga.com/life-style/ayurveda/the-ayurvedic-benefits-of-chia-seeds/

ESSENTIAL SPROUTING GUIDE

boston health coach sprout

I became curious about sprouting while enrolled in my 10-week Ayurvedic-based habit change program. (I'll be announcing my pilot program for 50% off the normal rate soon - make sure you sign up for my newsletter so you don't miss it!) One of the habits is Plant Based Diet (PBD) which involves a deeper look at the plants we eat. I already do my best to eat local and organic. My go-to grocery stores are Whole Foods & Trader Joes. I'm lucky enough to live within walking distance of both, and each store carries their own unique options. Lately, I've been making more of an effort to get to know my local plant species. Now, I spend more time at the Boston Public Market, Boston Growers in Coolidge Corner, and various other farmers markets near my home in Cambridge. I also recently signed up for Boston Organics - a super customizable no commitment CSA-type of program. Check it out if you're in the area!

Ok let's chat SPROUTS. I used to purchase sprouts at Whole Foods until I found out how simple and affordable it is to grow them at home. I'm talking $5 vs. $.25... pretty big difference right? The best part is that it's so easy! Indoor gardening may sound intimidating ...it totally did to me. Let's just say, I'm not the BEST at keeping plants alive. But sprouting is a game-changer. My favorite part about this sprouting recipe is that it requires no soil - the key to why it's so simple. Honestly, the hardest part about sprouting is remembering to rinse your seeds twice a day. 

Sprouts are the quintessential nutritional powerhouse. Think of a plant as a human being. A seed as an embryo, a sprout as a feisty and energetic toddler, a full grown plant as a strong and grounded adult. When we eat unsprouted seeds we are eating locked up potential. If sprouts are comparable to an energetic toddler, can you imagine about how much more energy sprouted seeds can provide? Imagine absorbing all that energy. When you eat sprouts you are literally eating potential, energy, and fresh perspective. Don't get me wrong, seeds and nuts are still good for you, and fully grown plants have their place in our diet as well. It's just that sprouting seeds cracks open their potential making their nutrients more digestible and bio-available to your body. (To sprout nuts all you have to do is soak them overnight in a bowl of water and rinse them in the morning. They won't grow a tail but you'll notice they become more plump and soft. Eat them right away or dehydrate and freeze them for snacking. If you get bellyaches from eating nuts this is a game changer).

Eating sprouts will...

improve your digestion, boost metabolism, increase enzymatic activity throughout the body, help with weight loss, lower cholesterol, prevent anemia, boost skin health, improve vision, support the immune system, increase energy reserves, reduce blood pressure, and prevent neural tube defects in infants.

The most common sprouts are alfalfa. You'll typically find those in grocery stores but you can really sprout any seed! Just make sure you are buying "sprouting seeds". I get mine at Cambridge Naturals. Try out a few different seed varieties and see what you vibe most with!

Sprouts contain:
- Vitamin C, A, K, B6
- Fiber
- Manganese
- Riboflavin
- Copper
- Protein
- Thiamin and Niacin
- Panthothenic acid
- Iron
- Magnesium
- Phosphorus
- Potassium
- Calcium

How to make your own Sprouts

Kitchen Tools & Ingredients:
32 oz Mason Jar
Sprouting Lid, cheesecloth or a Mason Jar lid with holes poked in it
Sprouting Seeds like Alfalfa, Red Clover, Broccoli (purchase at local herb market or Amazon)

Directions
1. Soak 1 tablespoon of sprouting seeds in water for 10 minutes.
2. Strain seeds through the sprouting lid, cheesecloth or holey lid.
3. Put seeds into jar with a cup or two (doesn't have to be accurate) of cool water. Let sit for 8 hours.
4. Drain the jar, shake the jar to spread the seeds around the inside of the jar (you do not want the seeds covering the drain holes), and place lid-side down in a bowl on a slant so the water can continue to drain.
5. Rinse and swirl seeds in the jar 2-3 times a day, placing it back in the bowl at an angle. Do this for 4 days.
6. After 4 days, place the sprouts by the window in indirect sunlight to help them green up and develop chlorophyll. Do your rinsing routine keeping them by the window for 2 more days.
7. Once you see green tails and a little tiny leaf, you will know your sprouts are ready! Empty your cute little sprouts in a large bowl of cool water and use your fingers to loosen up the sprouts. Use a mini strainer or spoon to remove the seeds that floated to the top.
8. Spread 2 layers of paper towel on a baking sheet and lay your sprouts out to dry (you can use a salad spinner if you have one) for a few hours. Timing will vary on your indoor climate.
9. To store, first make sure your sprouts are dry (or they will rot). Line a tupperware container with a paper towel and pack in your sprouts. You can pack them in tightly, this will not affect their quality.

My favorite ways to enjoy raw sprouts (cooking sprouts negates their nutritional value):
- Avocado Toast
- Salads
- Warm Grain Bowls
- Sandwiches

What's your favorite way to eat sprouts? Leave me a comment below!


SPICY SHRIMP TACOS AKA THE PERFECT TACO

Image by Well Plated By Erin Healthy-Shrimp-Tacos-with-Shrimp-Taco-Sauce-600x842.jpg

Hi guess what? I love tacos. And I bet you do too because seriously how could you not? First, tortilla's are the perfect vehicle for food. Second, you can put any type of combination of food inside of said tortillas. And third, they're gluten free so that's pretty great because that means less inflammation in our bods!

I made myself tacos last night and tonight. No shame. Last night, I stuffed my tortillas with pan-fried zucchini, red pepper, portabello mushroom, and roasted butternut squash, topped it with tomatillo salsa, fauxmaggio cheese and then proceeded to house them. And I came to a realization.... tacos NEED to have some sort of protein in them. Without shrimp, fish, meat, or tofu something just feels incomplete. The ratio is all off. The texture is underwhelming. My belly is unsatisfied. Therefore, I created proper taco-Tuesday-style Spicy Shrimp Tacos. Read on for the recipe.

I typically buy my seafood fresh from my local Whole Foods but since I found out the shrimp at the fishmonger counter is previously frozen anyway, I bought myself a huge 5 lb bag of frozen shrimp. Might as well control the process myself. When buying frozen shrimp look for the label IQF which stands for "Individually Quick Frozen" which means the shrimp weren't frozen in one huge block and are most likely going to have a better texture and flavor. Make sure the only ingredient is shrimp; no preservatives, no additives. 

So now with this new epiphany, I set out to make the perfect taco.

The Perfect Taco = protein + crema or guacamole + slaw or onions + cilantro + lime + optional cotija cheese.

Let me know what you think in the comments below. Also, tell me what your favorite kind of taco is!

Spicy Shrimp Tacos with Cilantro Lime Slaw and Avocado Crema

Prep time: 15 minutes
Cook time: 5 minutes

Ingredients

For the Garlic Cilantro Lime Sauce:
¼ cup avocado oil
¼ cup water
½ shallot
½ cup cilantro leaves
2 cloves garlic
½ teaspoon salt (himalayan is my fave, full of minerals)
juice of 2 limes (or 1 lemon if you don't have limes)
½ cup organic greek yogurt
¼ avocado

For the Shrimp Tacos:

1 lb. shrimp, peeled and deveined, tails removed
1 tsp each chili powder, cumin, and smoked paprika
½ tsp salt
¼ tsp cayenne pepper (more or less to taste)
2-3 cups shredded green cabbage
6-8 soft corn tortillas (I used Siete Foods Cassava & Coconut tortillas since I'm trying not to eat corn right now)
1-2 avocados
Toppings: Cotija cheese (optional), cilantro, lime wedges

Instructions

  1. Blend all the sauce ingredients except the yogurt and avocado in a food processor. When mostly smooth, add the yogurt and pulse until combined. Taste and adjust as needed. Set aside.

  2. Heat a drizzle of oil a large skillet over medium high heat. Pat the shrimp dry with paper towels and sprinkle with the spices. Add the shrimp to the hot pan and saute for 5-8 minutes, flipping occasionally, until the shrimp are cooked through.

  3. Toss some of the sauce (not all) with the cabbage until it the cabbage is coated to your liking. It should resemble a coleslaw - you want it to be enough sauce so the cabbage is weighed down a little bit.

  4. Add avocado to sauce and blend. This makes your sauce nice and thick and perfect for drizzling on top of the tacos.

  5. To serve tacos, pile slices of avocado, 4-5 pieces of shrimp, coleslaw, and finish with Cotjia cheese (optional), cilantro, and lime wedges.


**Recipe inspired by Pinch of Yums Spicy Shrimp Tacos with Garlic Cilantro Lime Slaw recipe**

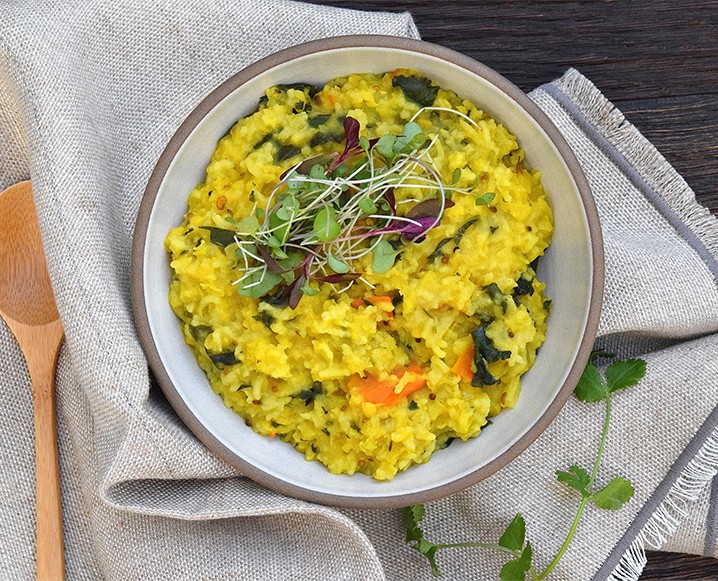
NATASHA'S SIMPLE KITCHARI

What is Kitchari? Kitchari is here to help you grow spiritually, physically, and emotionally. Kitchari has been consumed for over 10,000 years in India. It's fed to babies, seniors, the sickly; and eaten by those who have no appetite, have returned from a long trip or are simply on a budget.

Kitchari is also used as a cleansing method where you actually get to EAT. Now that's my kinda cleanse. To do this cleanse you eat kitchari for each meal, 3 or 4 times a day, until you are full. Remember, full doesn't mean stuffed. Full means 1/3 food, 1/3 water and 1/3 space. Yes, veggies partially count as water. No deprivation, no starvation, just pure grounded goodness. If you can't stomach kitchari in the morning feel free to eat a simple bowl of oatmeal (with no toppings!) instead and resume eating kitchari for your other meals. I'll do a kitchari cleanse mono-diet a couple times a year; spring and fall or whenever I feel like I need a reset which most of the time means after the holidays, too! I promise if you do this cleanse you will feel grounded, balanced and deeply nourished.

Did you know that it is statistically proven that juice cleanses actually HARM our bodies. Why is this fad still around! I don't get it. Intense food deprivation cleanses okay for you but are not sustainable unless you are following all of the proper rules (enema's, relaxation, reflection, etc.). I personally don't go there, so kitchari is the perfect cleanse food cleanse for me and it's a great place to start for anybody. The mix of rice and dahl in kitchari contain 20 essential amino acids which create a perfect protein to sustain your body. You can also eat this as a main or side dish, even if you're not cleansing... it's that tasty.

If you're curious to find out more about kitchari sign up for a free call and we can chat. I'd be happy to guide you through my experience with cleansing and Ayurveda by providing you with helpful steps, tips, and insight. 

Image credit : The Chalkboard Mag

Natasha's Simple Kitchari Recipe

Prep time: 6-12 hours (includes soaking time)
Cook time: 30 mins
Serves: 4-6 servings

INGREDIENTS
½ cup split mung beans (link at bottom of post)
¼ cup organic basmati rice (or quinoa if you have a kapha imbalance)
1 3x2 inch strip of kombu seaweed, cut into small pieces, or a few pieces of dried wakame
6-8 cups of filtered water
3-4 cups fresh, organic and seasonal veggies (use at least one green veggie such as spinach or kale and one orange or root vegetable such as carrot, sweet potato or squash)
1-2 Tbsp of CCF blend (made by grinding equal parts of cumin, coriander and fennel seed or by mixing the pre-ground spices)
⅛ tsp asafoetida/hing (not gluten-free, add extra ginger if you are gluten sensitive)
1 Tbsp minced fresh ginger root
1 tsp turmeric powder
1 cup loosely packed chopped, fresh organic cilantro
2-3 Tbsp ghee (Vegans can use coconut oil in the warmer months or sesame oil in the cooler months use less ghee if you have kapha imbalance, lots of accumulation, or excess weight).
½ - 1 tsp rock salt

INSTRUCTIONS

1. Soak the grain and split mung beans (I don’t really measure I just do a 2:1 ratio of beans to rice) overnight or between 6-12 hours.

2. Rinse the grain and mung beans until the water runs clear then put them in a big pot with the seaweed and water enough to cover by at least an inch or 2 (about 3 cups of water depending on your pot).

3. Boil until soft, about 15-20 minutes. Chop veggies and cilantro and grind spices (if using whole spices. You can also roast them before grinding to enhance the flavors) as the rice and beans cook.

4. Add the veggies (keep kale or quick-cooking veggies out for now), add 2 more cups of water and cover. Cook 3-5 minutes or so until the water boils veggies are starting to soften. Add more water and adjust temperature as needed.

5. Once veggies start to soften, add the minced ginger, and spices (cumin, coriander, fennel, asafoetida and turmeric).  When making a warming kitchari in the fall or winter I’ll add a little black pepper and a dash of cinnamon too, maybe some raisins.

6. Add the kale, spinach or other quick-cooking veggies and the fresh cilantro. Stir.

7. Add ghee or oil (or neither) and rock salt.

8. Turn off heat, and serve with microgreens/fresh cilantro and a wedge of lime or chutney.

Try this out and if you don't like these spices then go ahead and use your favorites. You can use italian spices, Mediterranean spices, whatever! Let your creativity flow. Share this recipe with a friend! It's always best to cleanse with an accountability partner.

If the list of ingredients stresses you out you can purchase a hand-dandy Kitchari kit here!


GF HONEY OAT BANANA MUFFINS

My favorite thing to do on weekends is watch Food Network's The Kitchen (seriously my favorite show EVER, check it out if you haven't yet) and bake delicious goodies.

My weekly meals consist of mostly plant-based foods with the occasional boiled egg or roasted fish so when Sunday comes around it's my mission to try out a new good-for-you cookie, muffin, or other sweet treat recipe. Being gluten-free used to limit my breakfast and dessert intake immensely - there were little to no options available at restaurants, coffee shops, even grocery stores. That was 8 years ago and now the world has finally caught up which for me is a blessing and a curse. Hear me out here. I am so happy that the Celiac and GF population can now enjoy foods that they used to miss out on. Our previous avoidance of certain restaurants has gone down, and so has the envious stare-into-your-friends-mouth-as-she-takes-a-bite-of-stuffed-french-toast-from-your-favorite-breakfast-spot move. Not very classy.

Honey Oat Banana Muffins (Gluten Free) Recipe on www.natashawellness.com

But, have you noticed that all the gluten-free replacements are like 10 times more unhealthy than the gluten-full versions? Gluten-free pizza typically has 90 more calories, 4 grams less protein and 8 more grams of fat than regular pizza. GF sweet treats typically have more sugar and/or butter to maintain the gooey dense texture we've come to expect in a cookie or muffin. And I thought being gluten-free was more healthy. Not fair.

Honey Oat Banana Muffins (Gluten Free) Recipe on www.natashawellness.com

That's why I decided to try my hand at creating homemade treats. I know what's going into the batter, and into my belly. It's a win-win! Oh, and another positive is that each batch typically contains about 12 servings. Since I'm only feeding myself and my partner, the rest of the treats will either last us for a few days, get shared amongst visiting friends, or get frozen for later. My love of dessert is mostly a textural thing rather than a sugar-bomb craving so I can create a muffin that uses a small amount of sweetener and be happy. All I really care about is TEXTURE. And these muffins sure have a decadent gluten-y texture. 

My sweet recipes use honey, maple syrup, maple sugar, coconut sugar or mashed bananas for sweetness and coconut flour, almond flour, oats and chickpea flour for texture. Each sweetener and flour has it's own place and is just as satisfying as using the "regular" version. I also like to enhance my foods with nutrient dense superfoods like prunes, chia/flax/hemp seeds and nuts. Nutritious and delicious!

This weekend I made dense and delicious Honey Oat Banana Muffins. Packed with healthy fats, dietary fiber, Vitamin C, protein and anti-inflammatory nuts these babies will melt your all muffin-guilt away. Take a bite knowing you are feeding yourself real, wholesome food.

Try this recipe on your own and let me know what you think!

Honey Oat Banana Muffins (Gluten Free)

Honey Oat Banana Muffins (Gluten Free) Recipe on www.natashawellness.com

RAW GREEN SOUP

It's April 1st and it's snowing... it's time to admit climate change is real if you don't already. I'm bundled up in my toasty home, spending the day doing yoga, chillin with my puggle Eva and watching The Kitchen of course.

This week I've decided to incorporate more local veggies, more greens, more soups and more living things in my diet lately. Not living things like humans or animals but living vegetables, fresh, raw and ALIVE. Cate Stillman shared an amazing recipe with our group on Body Thrive (an amazing 10-week Ayurveda program I'm deep into). Spring is Kapha season but it just started snowing where I live so I'm still eating Vata-balancing foods. I made this soup just now and it is so freakin' quick and easy. The hardest part was getting out of the house to buy ingredients. I just finished eating it and I am stuffed, happy, hydrated, and warmed to the core. I'm also surprisingly full! I love myself a warm grain bowl with protein but as I head into Spring I'm looking to let go of some heaviness so this is exactly what I needed. So, if you're feeling chilly or are Vata-dominant this soup is for you. If you aren't sure what your Dosha is you can take this quiz. Take your results with a grain of salt and use them more as a guideline. To find out what your Dosha is exactly takes a lot more than an online quiz. My teacher once told me it requires 7-14 visits everyday to an Ayurvedic practitioner who reads your tongue, pulse, etc every time you come in. 

According to my quiz results, I am equally tridoshic which is a bit confusing and doesn't guide me as easily as someone who is predominantly Vata, Kapha, or Pitta. This is why I follow the seasons and listen to what my body wants. That's really what Ayuerveda is all about - listening to your body and eaing, moving, breathing in a way that is suitable for YOUR BODY. Try this recipe and let me know what you think. And if it's too raw for you, cook it up a little post-blend.

Basic Vata Green Living Soup

Serves 2
Prep & cook time: 10 minutes
Adapted from Cate Stillman's Basic Vata Green Soup Recipe

Ingredients
1 cup fennel
1/2 cup yellow peppers
1 avocado
1/4 cup fresh basil or dill chopped
1 tbsp lemon juice
1/2 tsp honey
1 veggie broth cube
a dash or two of cayenne
salt and pepper to taste

Directions:
Blend with 4 cups boiling water. Garnish with fennel greens, dill, or sprouts.

And this is what you get... doesn't that color just brighten your day?


You can find this and other living soup recipes here.

HOMEMADE SAUERKRAUT

The calm before the storm at our Twist & Kraut Workshop back in February

The calm before the storm at our Twist & Kraut Workshop back in February

How To Make Homemade Sauerkraut in a Mason Jar

Prep time: 5 min
Cook time: 15 min
Makes: 1/2 to ¾ of a quart

Adapted from The Kitchn

INGREDIENTS
1/2 medium head cabbage (about 1.5 pounds)
2 1/4 teaspoons kosher or himalayan salt

EQUIPMENT
Cutting board
Chef's knife
Mixing bowl
1-quart wide-mouth canning jar (or two pint mason jars)

INSTRUCTIONS

  1. Clean everything: When fermenting anything, it's best to give the good, beneficial bacteria every chance of succeeding by starting off with as clean an environment as possible. Make sure your mason jar is washed and rinsed of all soap residue. You'll be using your hands to massage the salt into the cabbage, so give those a good wash, too. Wipe everything (cutting board, knife, jar) with white vinegar.

  2. Slice the cabbage: Discard the wilted, limp outer leaves of the cabbage. Slice the cabbage crosswise into very thin ribbons. Save a large outer leaf for step #5.

  3. Combine the cabbage and salt: Transfer the cabbage to a big mixing bowl and sprinkle the salt over top. Begin working the salt into the cabbage by massaging and squeezing the cabbage with your hands. At first it might not seem like enough salt, but gradually the cabbage will become watery and limp — more like coleslaw than raw cabbage. This will take 5 to 10 minutes.

  4. Pack the cabbage into the jar: Grab handfuls of the cabbage and pack them into the canning jar. Every so often, tamp down the cabbage in the jar with your fist. Pour any liquid released by the cabbage while you were massaging it into the jar.

  5. Place one of the larger outer leaves of the cabbage over the surface of the sliced cabbage. This will help keep the cabbage submerged in its liquid.

  6. Lid the jar.

  7. Press the cabbage the next day. As the cabbage releases its liquid, it will become more limp and compact and the liquid will rise over the top of the cabbage.

  8. Add extra liquid, if needed: If after 24 hours, the liquid has not risen above the cabbage, dissolve 1 teaspoon of salt in 1 cup of water and add enough to submerge the cabbage.

  9. Ferment the cabbage for 3 to 14 days. Your taste will determine when it’s done more so than length of time. As it's fermenting, keep the sauerkraut away from direct sunlight and at a cool room temperature — ideally 65°F to 75°F. Burp (to release the pressure) it daily and press it down if the cabbage is floating above the liquid.

  10. Because this is a small batch of sauerkraut, it will ferment more quickly than larger batches. Start tasting it after 3 days — when the sauerkraut tastes good to you, put it in the refrigerator. You can also allow the sauerkraut to continue fermenting for 14 days or even longer. There's no hard-and-fast rule for when the sauerkraut is "done" — go by how it tastes.

  11. While it's fermenting, you may see bubbles coming through the cabbage, foam on the top, or white scum. These are all signs of a healthy, happy fermentation process. The scum can be skimmed off the top either during fermentation or before refrigerating. If you see any mold, toss it.

  12. Store sauerkraut for several months: This sauerkraut is a fermented product so it will keep for at least two months and often longer if kept refrigerated. As long as it still tastes and smells good to eat, it will be. If you like, you can transfer the sauerkraut to a smaller container for longer storage.

Recipe Notes

  • Sauerkraut with other cabbages: Red cabbage, napa cabbage, and other cabbages all make great sauerkraut. Make individual batches or mix them up for a multi-colored sauerkraut!

  • Larger or smaller batches: To make larger or smaller batches of sauerkraut, keep same ratio of cabbage to salt and adjust the size of the container. Smaller batches will ferment more quickly and larger batches will take longer.

  • Hot and cold temperatures: Do everything you can to store sauerkraut at a cool room temperature. At high temperatures, the sauerkraut can sometimes become unappetizingly mushy or go bad. Low temperatures (above freezing) are fine, but fermentation will proceed more slowly.

What's your favorite fermented food recipe? Please share below!

ITALIAN SPAGHETTI SQUASH BOATS

Italian Veggie Spaghetti Squash Bowls

Cooking time: 45 minutes

Ingredients
1 Spaghetti Squash
1 14oz can of tomato sauce
1 package mushrooms, cut into quarters (portobella, baby bella, shitake, white button)
1 package grape tomatoes, halved
a few handfuls of Spinach
3 cloves garlic
1/2 onion
2 tsp coconut oil
1 tsp olive oil
1/2 tsp smoked paprika
1/2 tsp red pepper flakes
3 tsp herbs: any ratio you liked of basil, oregano, parsley
salt and pepper
1/4 tsp allspice (optional)
grated parmesan cheese, freshly grated is best! (optional)

Directions

1. Preheat over to 450 degrees. While the oven is heating up, cut off ends of spaghetti squash, then cut in half lengthwise. Coat with olive oil, salt and pepper. Pour water onto cookie sheet and place squash face down on sheet. Set timer for 45 minutes.

2. While squash is cooking, sautee onions and garlic in coconut oil with a little salt and pepper. Add in mushrooms, cooking for 5 minutes. Add in tomatoes, s&p and cook for 2 minutes or so. Add in spinach and tomato sauce. Let it come to a boil then cover and simmer while squash cooks.

3. After 40 minutes flip squash over and spoon sauce veggie mixture in the bowls of the squash. Set oven to broil. Grate parmesean cheese on top and put back into over for 5 minutes.

4. Carefully remove squash from over and place on a plate. Add more parm if you want.

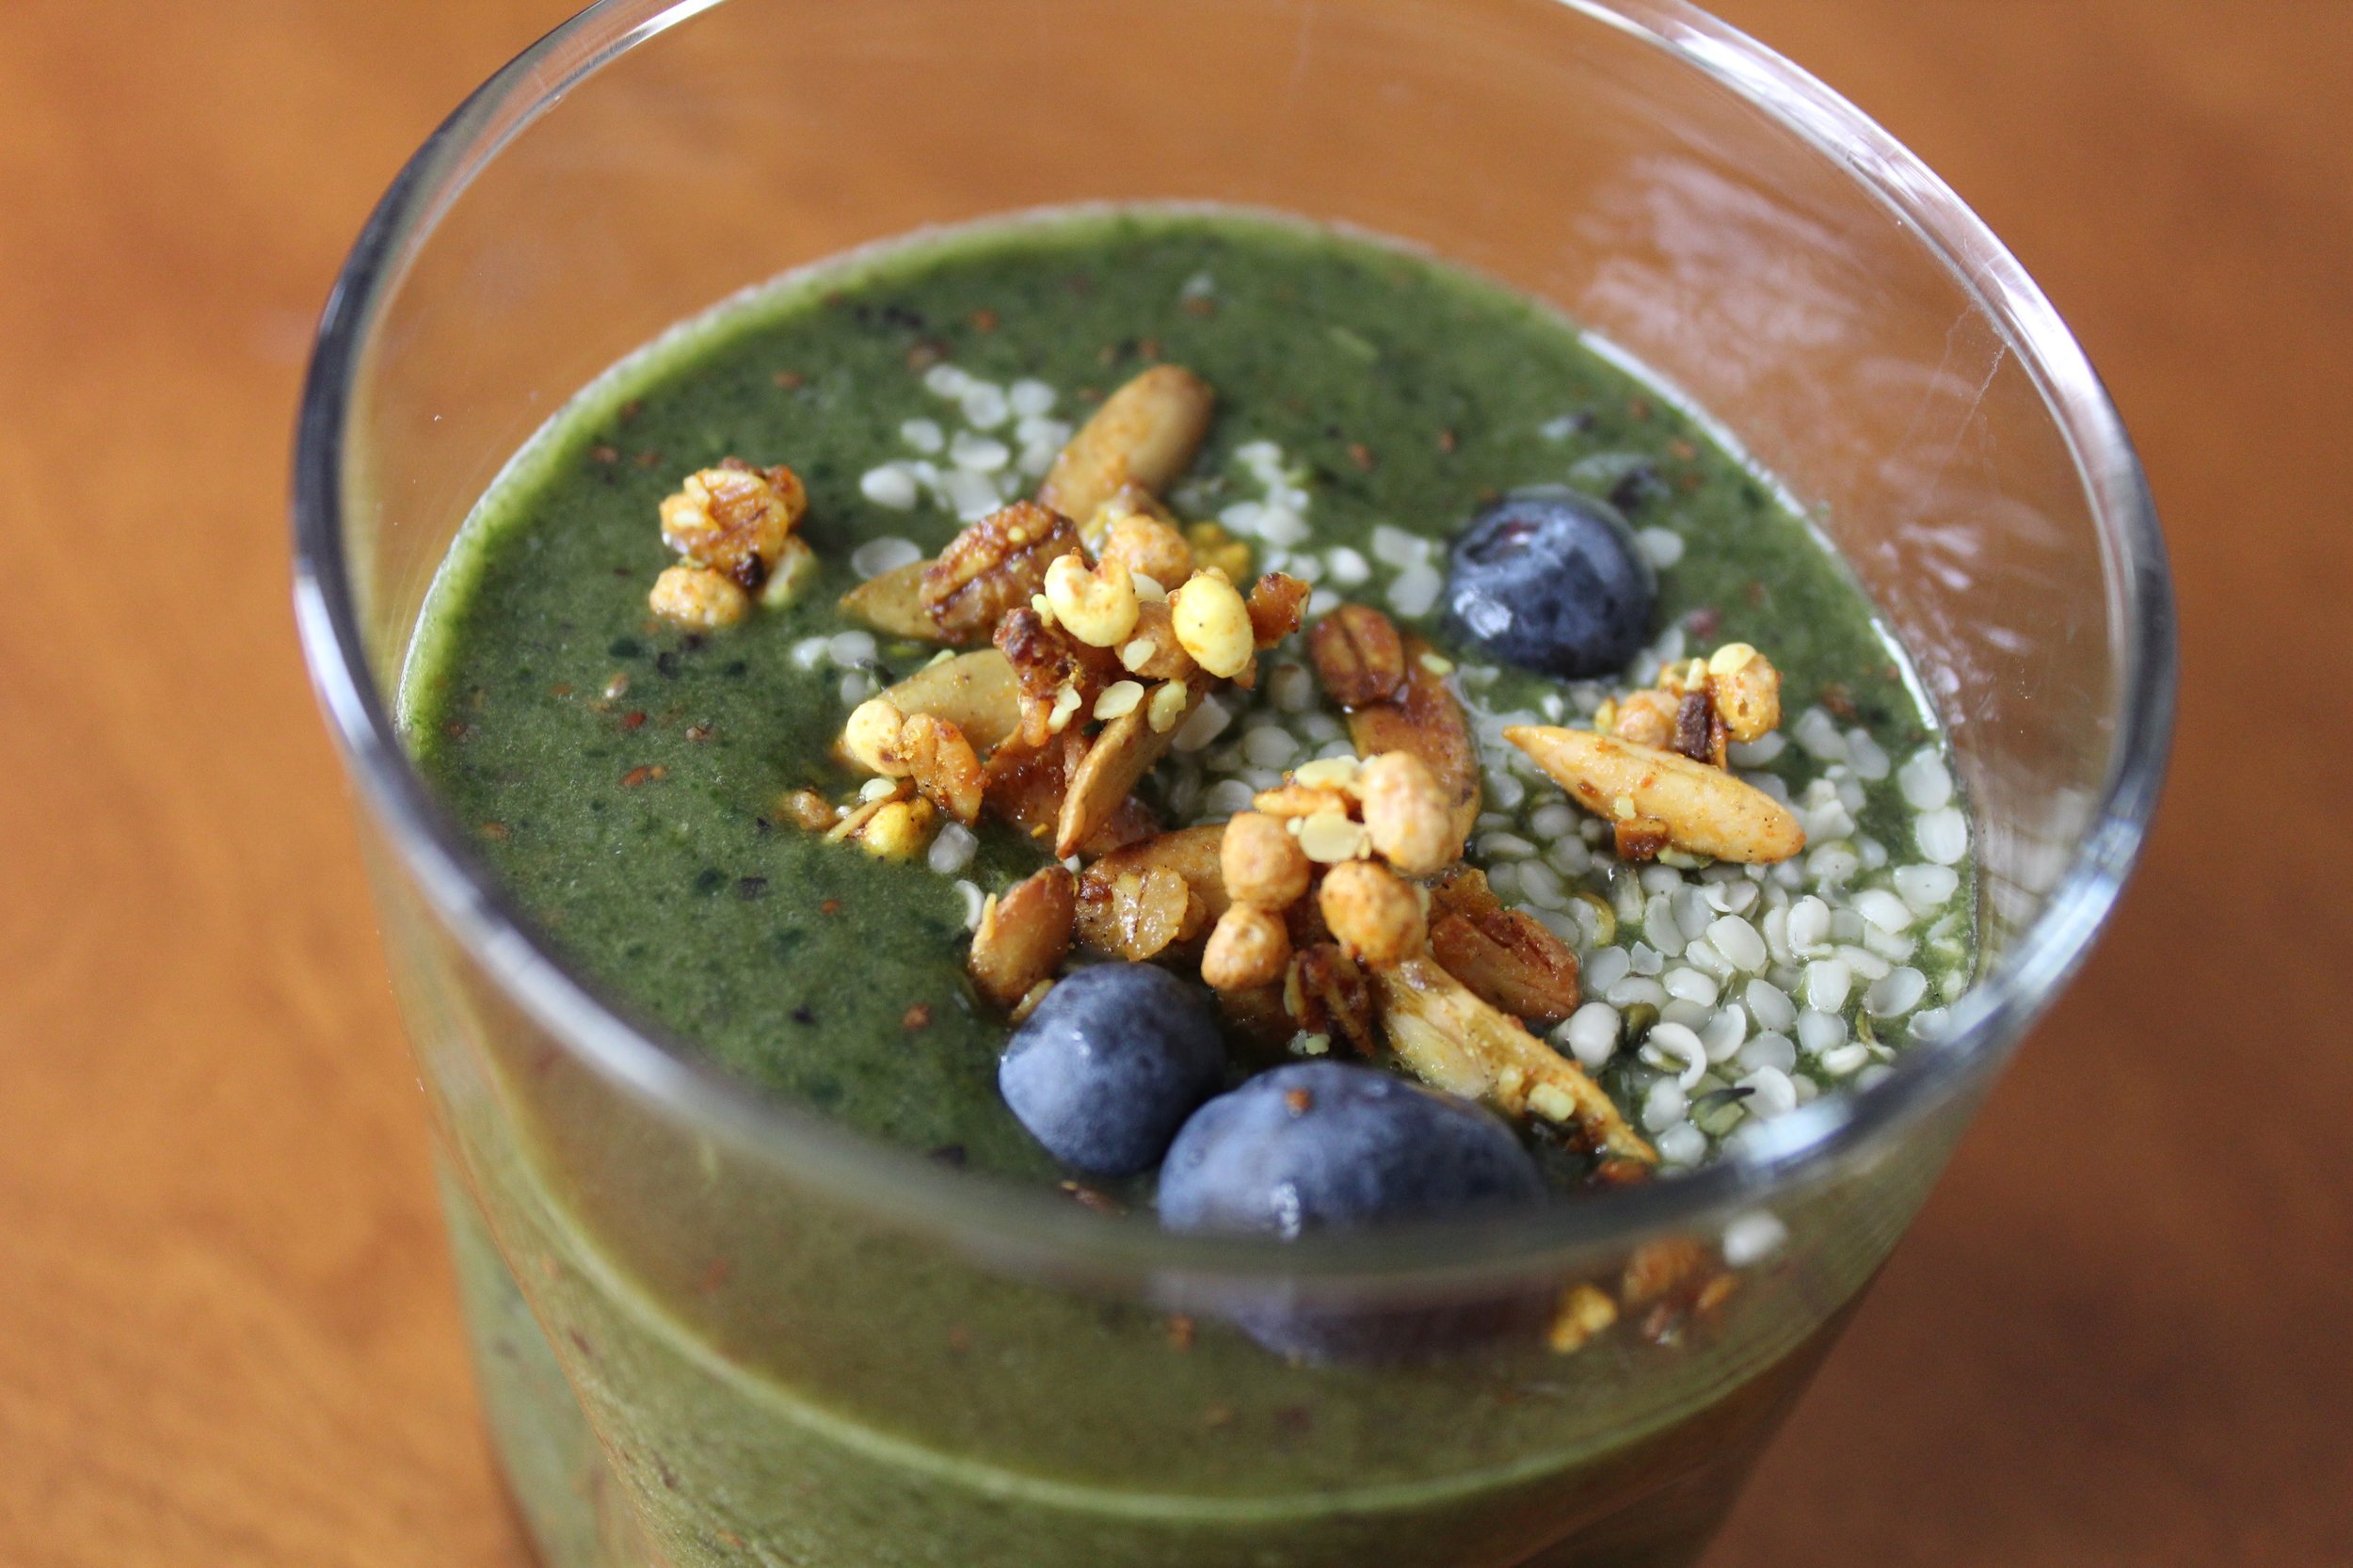
SIMPLE GREEN SMOOTHIE

Do you ever wake up and realize you indulged a little too much at dinner last night, and are not excited to stuff your face with a huge breakfast? Welp, this happened to me last night. We had a big dinner followed by a HUGE peanutbutter cup oatmeal cookie. As full as I was, I am not one to skip dessert especially if there's chocolate involved. So today I woke up drank a tall glass of warm water with lemon to flush out my system and once I got hungry decided it was most definitely a smoothie kind of day. I wasn't always a huge smoothie fan, I strayed away from the popular cold beverage since summertime because, hello! this is Boston and it's freezing out! That's when I learned that not all smoothies have to be cold. Huge lightbulb moment. If you use fresh fruit instead of frozen, or a mixture of the two, you get a pleasantly delicious drink that doesn't chill you to the core. Pro tip: make sure you take the extra few minutes to let your chia seeds soak. This makes them puff up and form a gel-like outer layer which makes them more bio-available to your body. Hydrated chia take longer to digest leaving you fuller longer, preventing blood sugar spikes and decreasing cholesterol. You can even soak them overnight - you can never soak chia for too long!

Morning Green Smoothie Recipe from www.natashawellness.com


Morning Green Smoothie Recipe for Two 

Total prep time: 7 minutes

Ingredients
2 handfuls of spinach and/or kale
1/2 cup of blueberries
1 kiwi
1/2 apple (save the rest for a snack, your dog, or tomorrows smoothie)
1-2 tbsp chia seeds
1/2 cup water, coconut water, juice (I used Trader Joes Green Juice)
Top with a sprinkle of hemp seeds, granola, and/or blueberries

Directions:

1. Combine chia seeds and your choice of liquid in blender. Let chia seeds soak for 2-3 minutes while you gather the other ingredients.

2. Throw the rest of your fruits & greens in the blender and blend on high for 3-5 minutes. Kale and spinach are pretty fibrous so make sure you blend, blend, blend so you're not chewing your smoothie!

Morning Green Smoothie Recipe from www.natashawellness.com