recipe

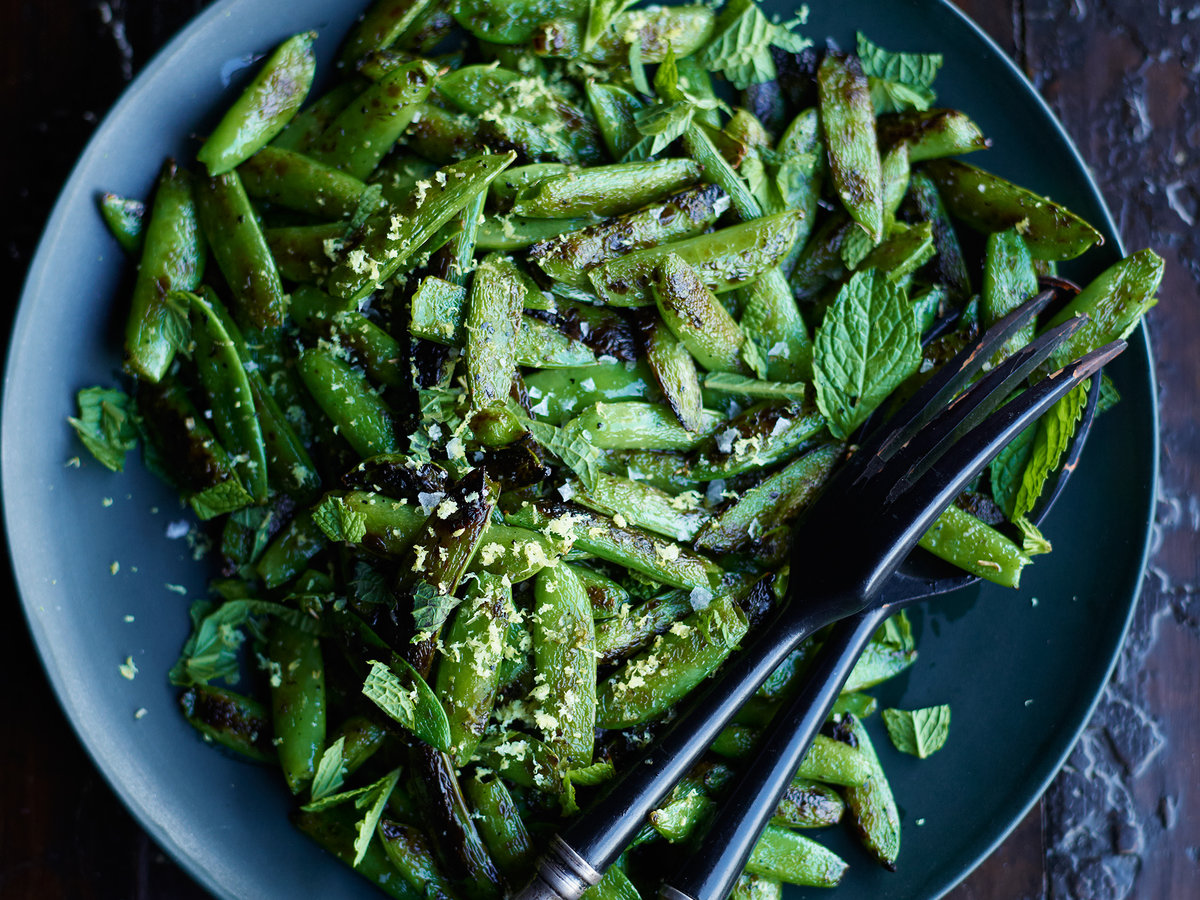
BLISTERED SUGAR SNAP PEAS

Photo Credit: Food & Wine Magazine

Photo Credit: Food & Wine Magazine

No longer are peas considered the unpleasant soggy side dish mom poured from a can when something green was needed with our dinner. With nutrients like vitamins C, K, and A, folate, fiber and protein, sugar snap peas make the list as one of my all-time favorite veggies. A very versatile—sometimes even fancy—little addition to my present-day plate. And because of their high-water content (90%!), you’ll get a nice, crispy crunch in every bite. And fear not having seconds. These little pods are packed with enough water to keep you both hydrated and feeling fuller longer on few calories—make that 26 calories per cup!

Sweet peas (and string beans) are among the most easily digestible beans, and are thus an important source of fiber and protein. They can help you stay regular and feel satisfied after meals. Their naturally cooling properties are soothing to Pitta. 

Below is my version of a similar dish I was taught to make at Barcelona Wine Bar in Brookline—and it’s so YUM! Ready for another plus of these little guys? They’re done in a snap! Now that’s what I call easy peasy 😊. To check out more recipes, simply scroll down. If you want to learn more about what foods are right for your body, let's have a conversation. Schedule a 30 minute free consultation call at natashawellness.com/appointment.


Blistered Sugar Snap Peas

Makes 2 servings

Ingredients
1 lb bag sugar snap peas
1-2 tsp toasted sesame oil
1 tbsp. toasted sunflower seed (or chopped peanuts)
1/2 tsp za’atar
½ tsp salt
Pinch of finishing salt (I like himalayan pink, sea, or pyramid salt)

Directions
1. Toast seeds or nuts on medium heat; set aside.
2. Add oil to pain on high heat.
3. Add peas, cover and cook, shaking pan until blistered on both sides.
4, Add salt while cooking. Peas are ready when blistered and brown.
5. Plate peas and sprinkle with seeds, finishing salt, and za’atar.

Side note: it would be tastier with peanuts but healthier with seeds


Resources:
Fruits & Veggies More Matters
http://www.fruitsandveggiesmorematters.org/about-fruits-and-veggies-more-matters
Sweet Peas

https://www.joyfulbelly.com/Ayurveda/ingredient/Sweet-Peas/123

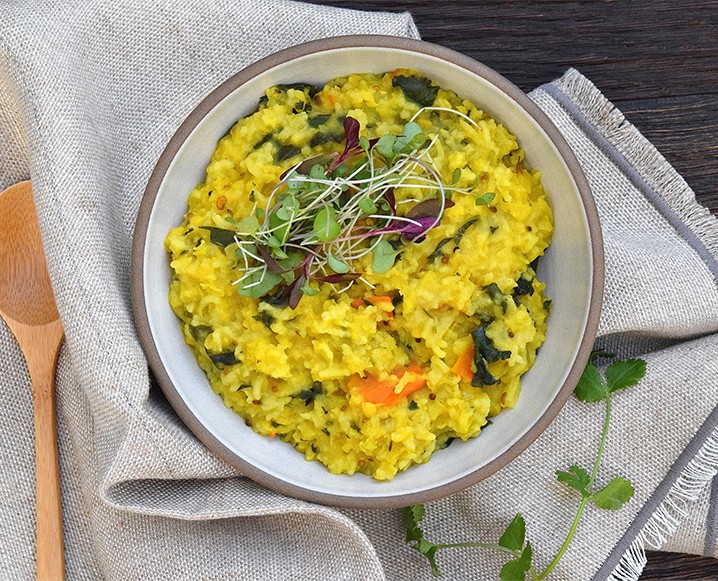
NATASHA'S SIMPLE KITCHARI

What is Kitchari? Kitchari is here to help you grow spiritually, physically, and emotionally. Kitchari has been consumed for over 10,000 years in India. It's fed to babies, seniors, the sickly; and eaten by those who have no appetite, have returned from a long trip or are simply on a budget.

Kitchari is also used as a cleansing method where you actually get to EAT. Now that's my kinda cleanse. To do this cleanse you eat kitchari for each meal, 3 or 4 times a day, until you are full. Remember, full doesn't mean stuffed. Full means 1/3 food, 1/3 water and 1/3 space. Yes, veggies partially count as water. No deprivation, no starvation, just pure grounded goodness. If you can't stomach kitchari in the morning feel free to eat a simple bowl of oatmeal (with no toppings!) instead and resume eating kitchari for your other meals. I'll do a kitchari cleanse mono-diet a couple times a year; spring and fall or whenever I feel like I need a reset which most of the time means after the holidays, too! I promise if you do this cleanse you will feel grounded, balanced and deeply nourished.

Did you know that it is statistically proven that juice cleanses actually HARM our bodies. Why is this fad still around! I don't get it. Intense food deprivation cleanses okay for you but are not sustainable unless you are following all of the proper rules (enema's, relaxation, reflection, etc.). I personally don't go there, so kitchari is the perfect cleanse food cleanse for me and it's a great place to start for anybody. The mix of rice and dahl in kitchari contain 20 essential amino acids which create a perfect protein to sustain your body. You can also eat this as a main or side dish, even if you're not cleansing... it's that tasty.

If you're curious to find out more about kitchari sign up for a free call and we can chat. I'd be happy to guide you through my experience with cleansing and Ayurveda by providing you with helpful steps, tips, and insight. 

Image credit : The Chalkboard Mag

Natasha's Simple Kitchari Recipe

Prep time: 6-12 hours (includes soaking time)
Cook time: 30 mins
Serves: 4-6 servings

INGREDIENTS
½ cup split mung beans (link at bottom of post)
¼ cup organic basmati rice (or quinoa if you have a kapha imbalance)
1 3x2 inch strip of kombu seaweed, cut into small pieces, or a few pieces of dried wakame
6-8 cups of filtered water
3-4 cups fresh, organic and seasonal veggies (use at least one green veggie such as spinach or kale and one orange or root vegetable such as carrot, sweet potato or squash)
1-2 Tbsp of CCF blend (made by grinding equal parts of cumin, coriander and fennel seed or by mixing the pre-ground spices)
⅛ tsp asafoetida/hing (not gluten-free, add extra ginger if you are gluten sensitive)
1 Tbsp minced fresh ginger root
1 tsp turmeric powder
1 cup loosely packed chopped, fresh organic cilantro
2-3 Tbsp ghee (Vegans can use coconut oil in the warmer months or sesame oil in the cooler months use less ghee if you have kapha imbalance, lots of accumulation, or excess weight).
½ - 1 tsp rock salt

INSTRUCTIONS

1. Soak the grain and split mung beans (I don’t really measure I just do a 2:1 ratio of beans to rice) overnight or between 6-12 hours.

2. Rinse the grain and mung beans until the water runs clear then put them in a big pot with the seaweed and water enough to cover by at least an inch or 2 (about 3 cups of water depending on your pot).

3. Boil until soft, about 15-20 minutes. Chop veggies and cilantro and grind spices (if using whole spices. You can also roast them before grinding to enhance the flavors) as the rice and beans cook.

4. Add the veggies (keep kale or quick-cooking veggies out for now), add 2 more cups of water and cover. Cook 3-5 minutes or so until the water boils veggies are starting to soften. Add more water and adjust temperature as needed.

5. Once veggies start to soften, add the minced ginger, and spices (cumin, coriander, fennel, asafoetida and turmeric).  When making a warming kitchari in the fall or winter I’ll add a little black pepper and a dash of cinnamon too, maybe some raisins.

6. Add the kale, spinach or other quick-cooking veggies and the fresh cilantro. Stir.

7. Add ghee or oil (or neither) and rock salt.

8. Turn off heat, and serve with microgreens/fresh cilantro and a wedge of lime or chutney.

Try this out and if you don't like these spices then go ahead and use your favorites. You can use italian spices, Mediterranean spices, whatever! Let your creativity flow. Share this recipe with a friend! It's always best to cleanse with an accountability partner.

If the list of ingredients stresses you out you can purchase a hand-dandy Kitchari kit here!


HOMEMADE SAUERKRAUT

The calm before the storm at our Twist & Kraut Workshop back in February

The calm before the storm at our Twist & Kraut Workshop back in February

How To Make Homemade Sauerkraut in a Mason Jar

Prep time: 5 min
Cook time: 15 min
Makes: 1/2 to ¾ of a quart

Adapted from The Kitchn

INGREDIENTS
1/2 medium head cabbage (about 1.5 pounds)
2 1/4 teaspoons kosher or himalayan salt

EQUIPMENT
Cutting board
Chef's knife
Mixing bowl
1-quart wide-mouth canning jar (or two pint mason jars)

INSTRUCTIONS

  1. Clean everything: When fermenting anything, it's best to give the good, beneficial bacteria every chance of succeeding by starting off with as clean an environment as possible. Make sure your mason jar is washed and rinsed of all soap residue. You'll be using your hands to massage the salt into the cabbage, so give those a good wash, too. Wipe everything (cutting board, knife, jar) with white vinegar.

  2. Slice the cabbage: Discard the wilted, limp outer leaves of the cabbage. Slice the cabbage crosswise into very thin ribbons. Save a large outer leaf for step #5.

  3. Combine the cabbage and salt: Transfer the cabbage to a big mixing bowl and sprinkle the salt over top. Begin working the salt into the cabbage by massaging and squeezing the cabbage with your hands. At first it might not seem like enough salt, but gradually the cabbage will become watery and limp — more like coleslaw than raw cabbage. This will take 5 to 10 minutes.

  4. Pack the cabbage into the jar: Grab handfuls of the cabbage and pack them into the canning jar. Every so often, tamp down the cabbage in the jar with your fist. Pour any liquid released by the cabbage while you were massaging it into the jar.

  5. Place one of the larger outer leaves of the cabbage over the surface of the sliced cabbage. This will help keep the cabbage submerged in its liquid.

  6. Lid the jar.

  7. Press the cabbage the next day. As the cabbage releases its liquid, it will become more limp and compact and the liquid will rise over the top of the cabbage.

  8. Add extra liquid, if needed: If after 24 hours, the liquid has not risen above the cabbage, dissolve 1 teaspoon of salt in 1 cup of water and add enough to submerge the cabbage.

  9. Ferment the cabbage for 3 to 14 days. Your taste will determine when it’s done more so than length of time. As it's fermenting, keep the sauerkraut away from direct sunlight and at a cool room temperature — ideally 65°F to 75°F. Burp (to release the pressure) it daily and press it down if the cabbage is floating above the liquid.

  10. Because this is a small batch of sauerkraut, it will ferment more quickly than larger batches. Start tasting it after 3 days — when the sauerkraut tastes good to you, put it in the refrigerator. You can also allow the sauerkraut to continue fermenting for 14 days or even longer. There's no hard-and-fast rule for when the sauerkraut is "done" — go by how it tastes.

  11. While it's fermenting, you may see bubbles coming through the cabbage, foam on the top, or white scum. These are all signs of a healthy, happy fermentation process. The scum can be skimmed off the top either during fermentation or before refrigerating. If you see any mold, toss it.

  12. Store sauerkraut for several months: This sauerkraut is a fermented product so it will keep for at least two months and often longer if kept refrigerated. As long as it still tastes and smells good to eat, it will be. If you like, you can transfer the sauerkraut to a smaller container for longer storage.

Recipe Notes

  • Sauerkraut with other cabbages: Red cabbage, napa cabbage, and other cabbages all make great sauerkraut. Make individual batches or mix them up for a multi-colored sauerkraut!

  • Larger or smaller batches: To make larger or smaller batches of sauerkraut, keep same ratio of cabbage to salt and adjust the size of the container. Smaller batches will ferment more quickly and larger batches will take longer.

  • Hot and cold temperatures: Do everything you can to store sauerkraut at a cool room temperature. At high temperatures, the sauerkraut can sometimes become unappetizingly mushy or go bad. Low temperatures (above freezing) are fine, but fermentation will proceed more slowly.

What's your favorite fermented food recipe? Please share below!